TLDR: Your one stop shop for pallet projects.
How do you get your pallets? Where? What tools are needed and where are they available?
I cover the often overlooked basics of pallet projects in this post. I also cover most of the great pallet project ideas that are bouncing around out there and consolidate it here for you in one easy place!
Table Of Contents
Preparation: Finding the pallets and tools
Wood Pallet Accent Wall Project
-
Part one: Taking The Boards Off
-
Part Two: Sanding and Staining
-
Part Three: Prepping Your Wall
-
Part Four: Attaching The Boards To The Wall
-
Part Five (Optional): Creating room for wires
-
Part Six: Attaching pallet boards
-
Part Seven (Optional): Your wires need to run and hide
-
Part Eight: Outlets
-
Part Nine: Hang Up Your TV
-
Part Ten: Enjoy
Pallet Signs Project
-
Part One: Piecing them together
-
Part Two: Vinyl, Silhouette, and mats
-
Part Three: Painting
-
Part Four: Enjoy
Where The Wild Things Are Pallet Project
-
Part One: Putting the pieces together
-
Part Two: Sand it down and paint
-
Part Three: Stencil time
-
Part Three: Painting time
-
Part Four: Ta Da
Pallet Wood Hearts Project
-
Part One: Stencil time
-
Part Two: Cutting it down to size
-
Part Three: Tracing and putting the wood together
-
Part Four: Jigsaw time and finish up
Ikea Fjell Wardrobe Hack With Pallet Shelves Project
-
Part One: Painting
-
Part Two: Assembling the wardrobe and building in the back
-
Part Three: Putting in the shelves
-
Part Four: Lights
-
Part Five: Action
Pallet Bookshelves Project
-
Part One: Taking apart the pallet
-
Part Two: Sanding
-
Part Three: Staining and sealing
-
Part Four: Bottom boards and felt bumpers
-
Part Five: Stud finding and hanging
-
Part Six: Enjoy
Pallet Clock Project
-
Part One: Cutting down to size
-
Part Two: Stencil, cut, and sand
-
Part Three: Painting time
-
Part Four: Clock face
-
Part Five: Enjoy
Flower Planter Pallet Project
-
Part One: Taking it apart, putting it back together
-
Part Two: Stain, seal, paint and the trim
-
Part Three: Buy plants and enjoy
Raised Pallet Garden Project
-
Part One: Garden fabric
-
Part Two: Placement
-
Part Three: Planting time and enjoy
Strawberry Pallet Planter Project
-
Part One: Cutting it up
-
Part Two: Fitting it together
-
Part Three: Putting it together.
-
Part Four: Filling it in
Garden Shelf Pallet Project
-
Part One: Compartmentalizing
-
Part Two: Prime and dry brush
-
Part Three: Putting it up
Chicken Wire Planter Project
-
Part One: Sanding and wiring
-
Part Two: Cut the wire
-
Part Three: Staple it down
-
Part Four: Filling it up
Dog Bed Pallet Project
-
Part One: Dismantle and dimensions
-
Part Two: Measuring and cutting
-
Part Three: Attaching
-
Part Four: Sand and polish
Spice Rack Pallet Project
-
Part One: Dismantle and layout
-
Part Two: Putting it together
-
Part Three: Enjoy
Pallet Sofa Project
-
Part One: Sanding and painting
-
Part Two: Secure the pallets
-
Part Three: Lounge
Wine Rack Pallet Project
-
Part One: Cutting it up
-
Part Two: Putting it together
-
Part Three: Enjoy
Pallet Swing Project
-
Part One: Measuring
-
Part Two: Attaching
-
Part Three: Hang it up and enjoy
Pallet Table Project
-
Part One: Cutting it down to size
-
Part Two: Piecing it together
-
Part Three: Making it pretty
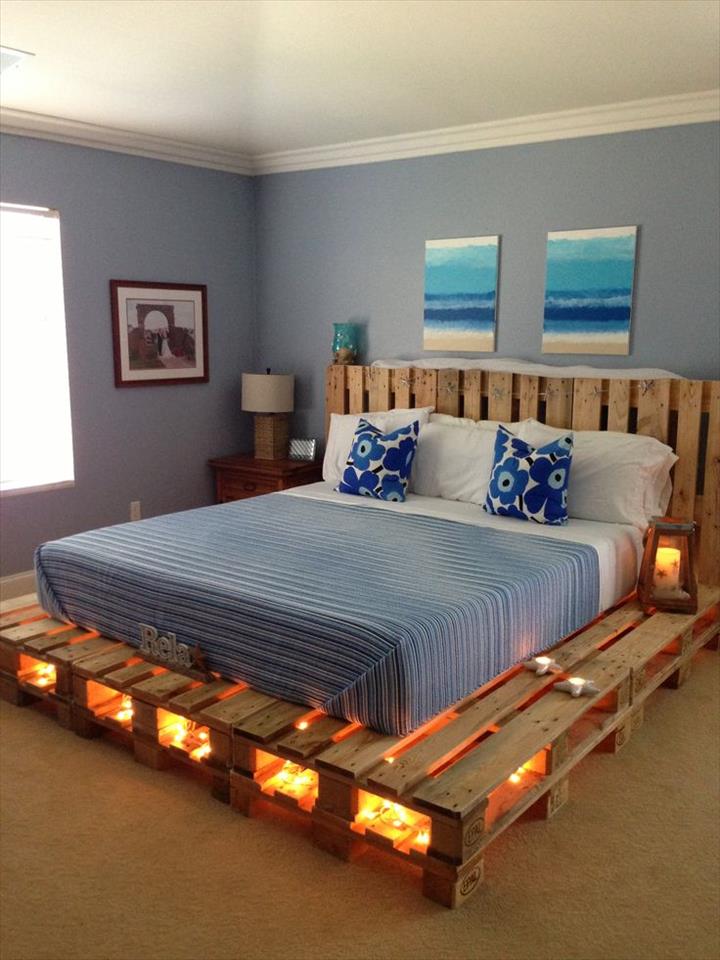
Glowing Pallet Bed Project
-
Part One: Getting the pallets ready
-
Part Two: Painting
-
Part Three: Putting it together
Hey Smart Moms!
If you’re like me and probably most women, you’ve at least seen these wood pallet projects all over the internet.
I thought, why not? I’m always up for a challenge. And I like to spend my time away from the office doing cool projects when the kids are at school.
However, when I started up on one, I realized there was hardly any information on the actual hard parts of these projects.
Like where do I find wood pallets? What If I don’t know about—let alone have—the tools required, right?
Also, I found more than enough sites that simply put pictures of the finished product up but never told you how to do it. No instructions and now links to anything helpful.
With this in mind, I hope to cover all areas for you that are often forgotten about or left out. Let’s go over what you should really expect when taking on one of these projects.
Preparation: Finding the pallets and tools
So this can be super easy or hard depending on who you know. It doesn’t seem that grocery and home improvement stores really give their pallets away. Apparently they more often have some kind of contract with pallet removal companies. But…I have heard that some people have asked these big stores sometimes and they’ve given them away. So it probably just depends on your area. Check it out to make sure! And small businesses or locally run businesses may be more than happy to let you have their pallets too.
Personally, I walked into some different stores, department and garden stores looking for pallets. I also called several places to see if they gave away pallets. Eventually, I bought mine at a delightful place called Garden Gateway. They warned me that they weren’t all intact or maybe had flaws but I didn’t care. I can easily work with that in my projects. And they were free. So yay!
I’ve heard stories of people finding them on the side of the road. Construction sites have some or if your friend is building a house they’re more than likely to have some of that stuff lying around.
Or, of course you can buy them. I found some at Freckle Farm for about $5 each.
Build a relationship. If you’re kind and considerate towards people, they’re more than likely to help you out. When you get to talking about your project, people tend to get even more interested and helpful.
Tools are the next big thing you need. But what do you need? And how do you get them?
Well, you can purchase them (an obvious one for people more committed to projects), you can borrow them (a free way that is super chill—just snag some from dad or your sister’s tool box…ask them first of course), or you can even rent them from places like Home-Depot and Lowes (basically your home department companies). Obviously I would go for the free version of borrowing them if you can.
I just bought mine a while ago because I like to work on a lot of things and a girl needs her tools to get stuff done.
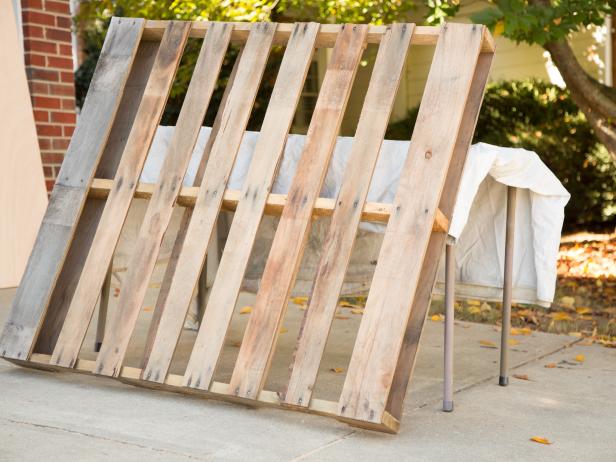
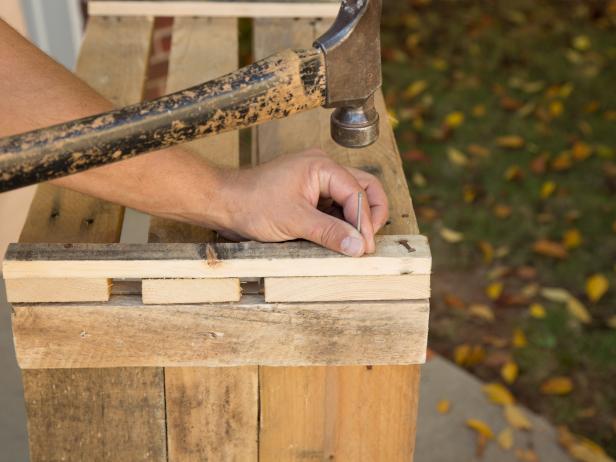
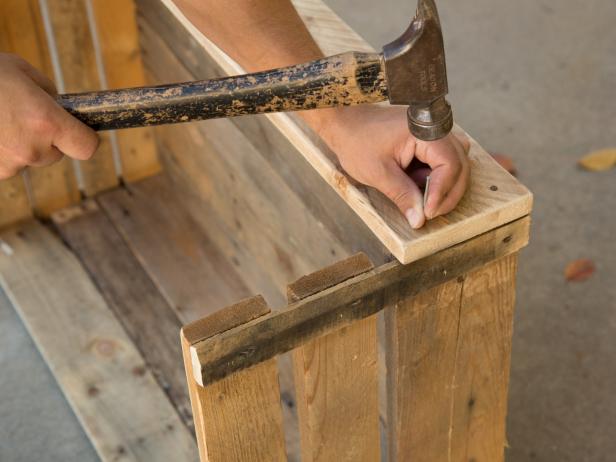
If you’re uncomfortable using power tools, you can always use crowbars to pry the wood planks off and then hammer out the nails. Though I wouldn’t recommend this because you tend to break more boards and it’s a much bigger pain in the butt.
But to each their own.
Wood Pallet Accent Wall Project
Wood accent walls are all the rage right now and for good reason. They add a certain cabin, comfy vibe to modern homes. They can also look stylish and sleek, a cute accent to otherwise bare walls. Best of all, wood walls are cheap (even free) and are easy to do in a day.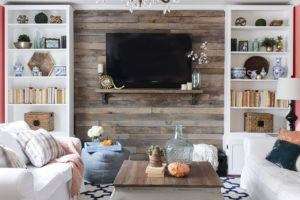
For your starting team you will need:
- 4 or more HT* wood pallets (depends on the space you’re working with)
- 1×3 boards that are 8ft. long (Need 6 or one for every stud)
- 1×3 board that are 8ft. long for wire pathways (for TV mounts)
- Tape (for TV mounts)
- Rubber gloves
- Face mask
- Measuring tape
- Cloth/rag
- Gray oil-based stain (aging wood)
- Stud finder
- Circular saw or miter saw
- Orbital sander
- 150 grit sandpaper
- Jigsaw
- Cordless drill
- Cordless brad nailer or pneumatic nail gun
- Reciprocating saw with 14 TPI metal-cutting saw blade
- 1 ¾ inch nails (18 gauge if using brad nailer)
- 8 x 2 ½ in. interior wood screws (about 50)
*Heat treated (HT) stamped pallets are safe for inside your home. Avoid using pallets that are stamped with MB because they are treated with chemicals and are not safe for your home. No stamp? I wouldn’t really risk it. You can try to find out its origin to make sure it didn’t carry chemicals, pesticides, and the like…but just be sure. You don’t want to be sanding down chemicals and have them fly around with the shavings.
Note:
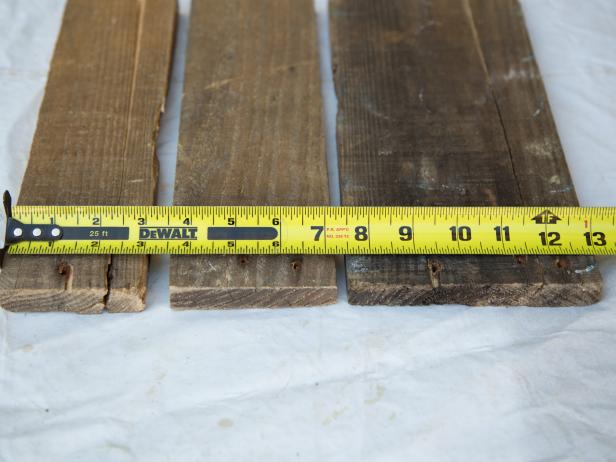
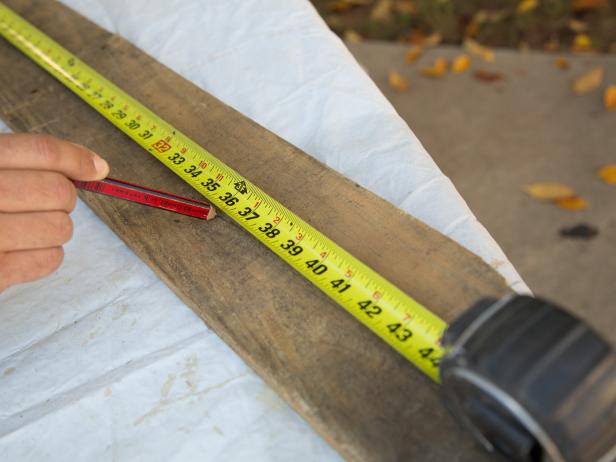
You’re looking about 50 inches (long) of wood for these pallet planks (about 6-8 planks per side). And they are about 1×4 in. boards. To figure out how much you’re going to need just multiply length of the accent wall by width (feeling the middle school feels?) then divide that total by the area that a pallet will fill.
Part one: Taking The Boards Off
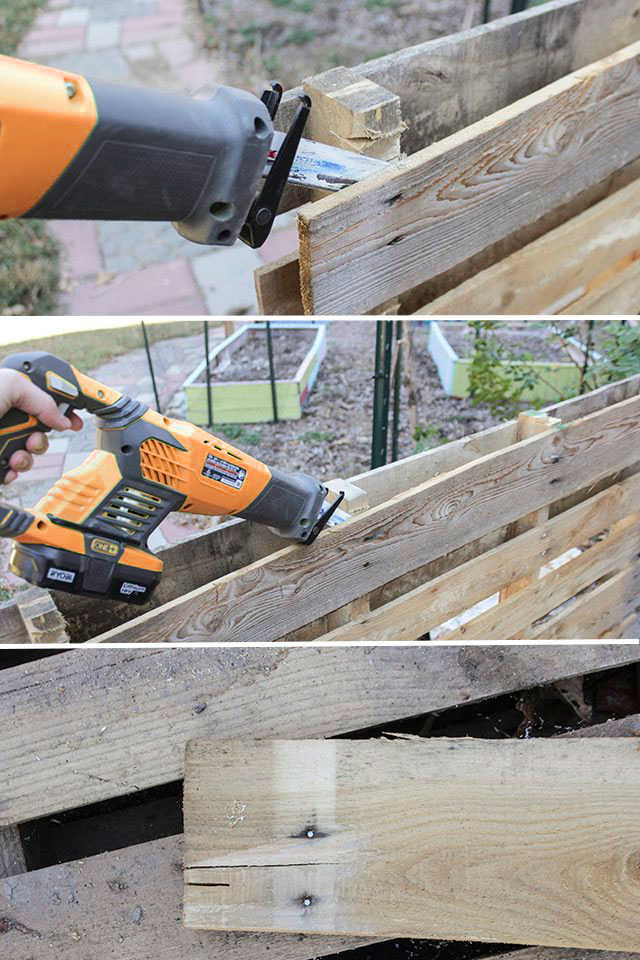
So pick up your reciprocating saw (you know, the one with the metal-cutting saw blade), and cut through the nails holding the boards down.
Remember, you can take them apart with crow bars if you’re uncomfortable with this power tool. Though the crow bars are a bit harder to manage. I tried and I broke three of my boards. Also, I don’t have great arm strength so…I looked a bit ridiculous fighting with the boards. But hey, whatever works for ya!
Note: Each nail does take some time to get through (up to 30 seconds). Make certain you’re not cutting it at an angle and keep the blade straight! Don’t want to cut up your wood (not that I did that…).
Part Two: Sanding and Staining
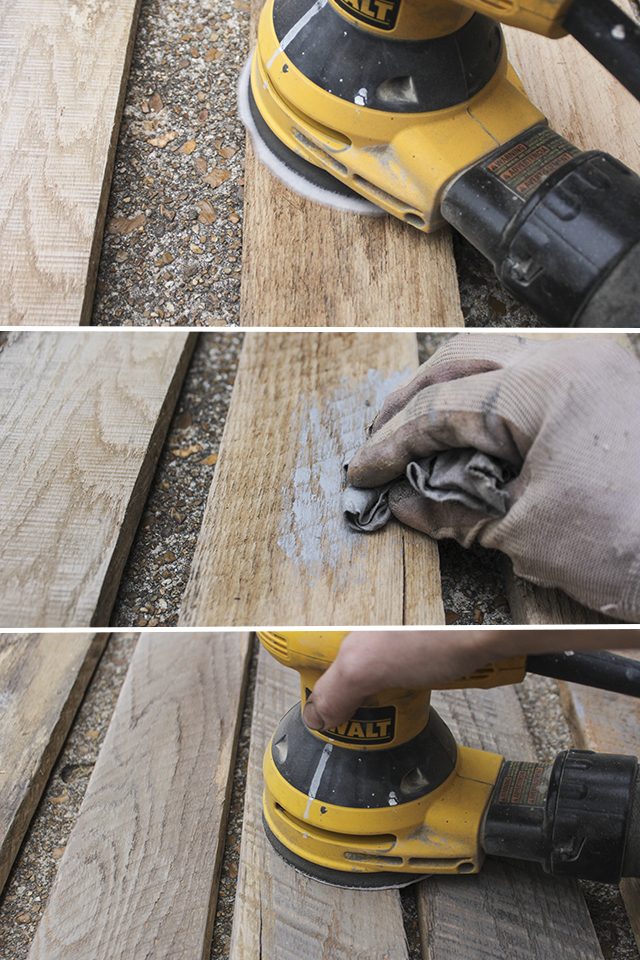
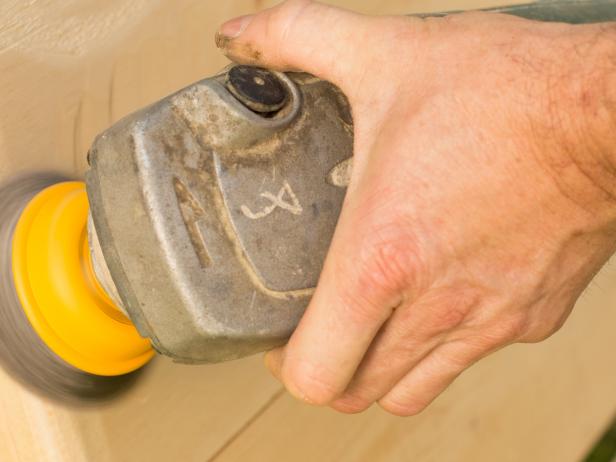
You can use that 150 grit sandpaper with the orbital sander to smooth out the surface and edges (want to get those splinters out!)
Remember to wear a face mask.
Sanding can make the wood look lighter and fresher. So if you were going for that aged look, simply use that gray-stain and apply it to the wood. Sand it lightly after it dries to distress the wood.
Make sure the planks are dry and clean before you attach them to your wall.
(Image: Shades of Blue Interiors) ©ehow.com
Part Three: Prepping Your Wall
Get your wall ready for its beauty make-over by removing everything on it and clearing space around the wall for you to maneuver your planks. (If you’re mounting a TV on the wall, now would be the time to attach the mounting where you’d like it to be).
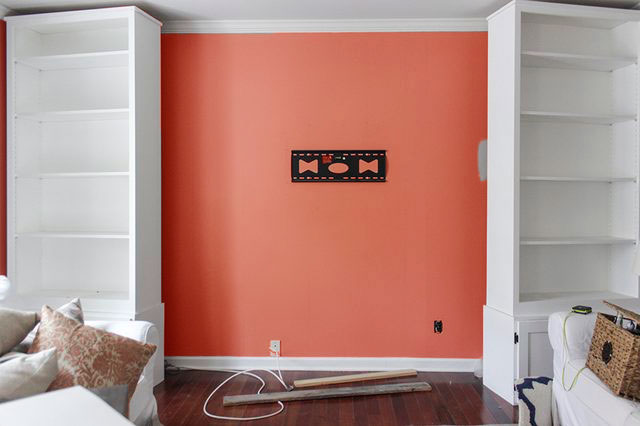
Part Four: Attaching The Boards To The Wall
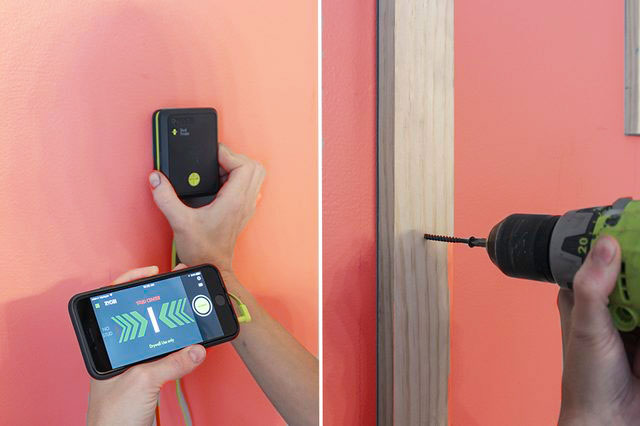
This is where your stud-finder comes into play. You want to figure out where those studs are and mark them. You’re going to be using your circular saw/miter saw to cut those 1×3 boards equal the height of the wall (remember to take into account any baseboard or trim). You’re going to screw those boards into the wall over those stud markings with your drill and the 2 ½ inch screws. About 5 screws per board should do the trick.
Remember to try not to use swears because little ears might be around at this point. Or at least mutter them under your breath.
Helpful note: If your kiddos are around, I found giving them scrap boards and a screwdriver to work on their own projects was fun for them and kept them from underfoot.
Part Five (Optional): Creating room for wires
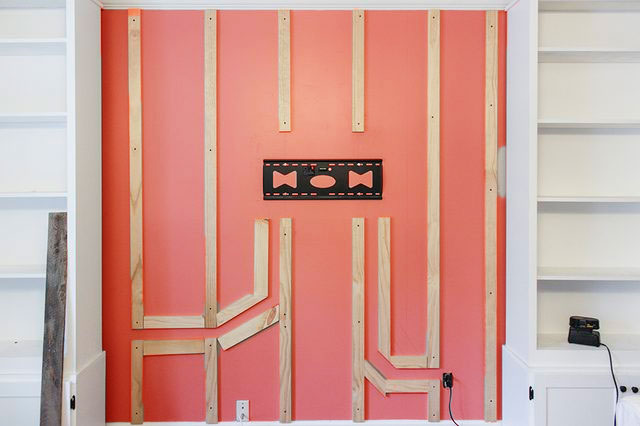
You do this part if you’re mounting that TV on the wall, which I did. You’re going to want to hide all those cords for the internet, speakers, TV, and all that to make it look smooth and kept. To do this, you will be cutting small angled pieces of 1×3 boards to make a pathway for the cords to run through. These should not be 90 degree angles, but rather 30 – 45 degree angles (wires get caught up less in those).
You will then attach these boards with the electric brad nailer and 1 ¾ in. nails into the drywall. You want to nail them at a downward angle.
Part Six: Attaching pallet boards
So you’ve got all those 1x3s up now, right? Great! If you’re like me, you did it between a soccer game and the next day. Hey, it happens. It may take you more than one afternoon.
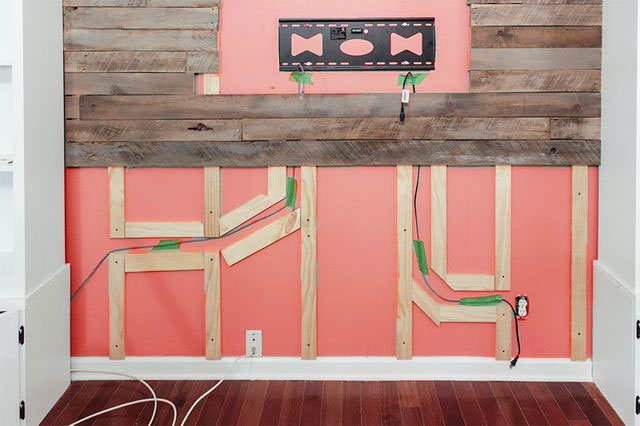
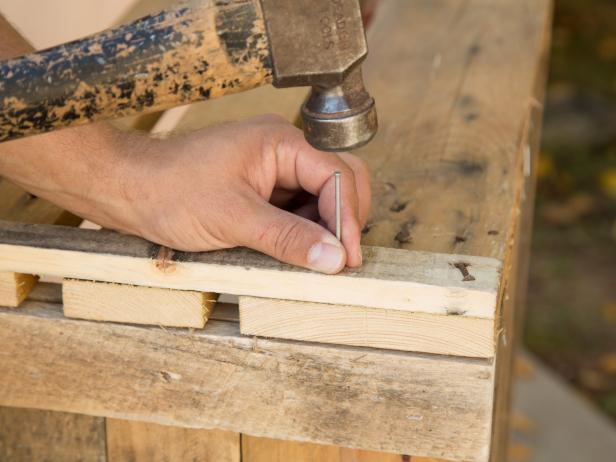
So now you can get those pallet planks up on the boards (using those 1 ¾ in. nails and electric brad nailer). You don’t want the seams to be even between your planks, so you don’t want them directly above one another. Instead, stagger them.
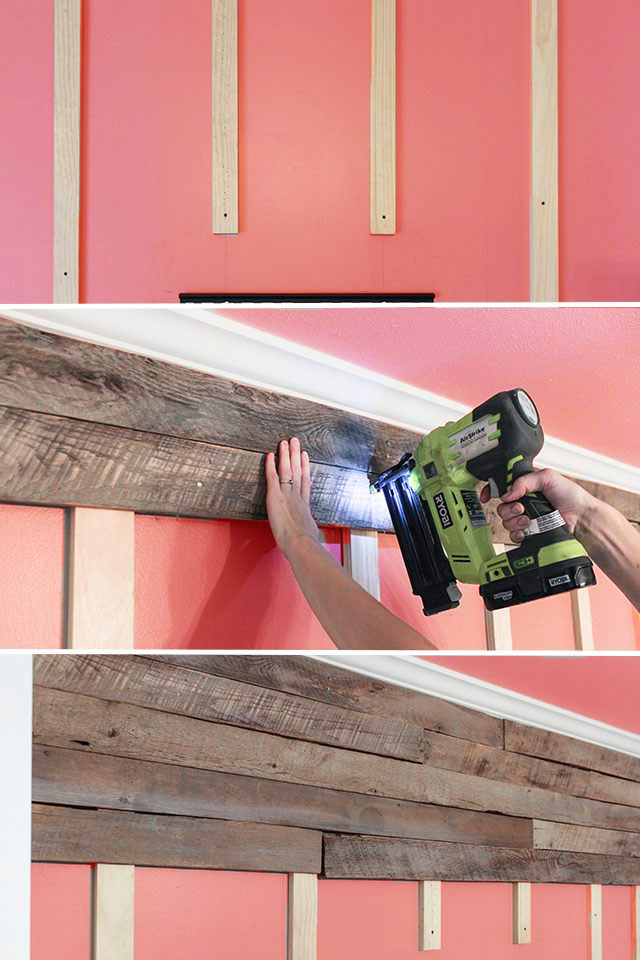
Note:
If you’re mounting a TV, make sure to measure around the back and leave room around the mounting for the TV. If your TV can tilt, you can put 1x3s behind the mounting device and into the studs so that there is space between the pallets and the TV. This will give the TV more tilting room.
Part Seven (Optional): Your wires need to run and hide
So back to those wires…after you have a few pallets up, run the wires through the space you created in part five. You can tape them in place until you have enough boards up and then remove it just before you cover that part of the wire up.
And hey, don’t nail down your wires.
Also, you may want to make sure your wiring fits electrical code. You can use a power management kit to do this, and there are many easy ones to purchase online.
Part Eight: Outlets
Make sure to account for your outlets! I totally forgot and started covering mine up before I realized my mistake. Luckily it’s an easy fix.
Simply measure from wall to outlet to fit the board, giving enough space around the outlet to account for the cover too. You can cut this out using your jigsaw.
Part Nine: Hang Up Your TV
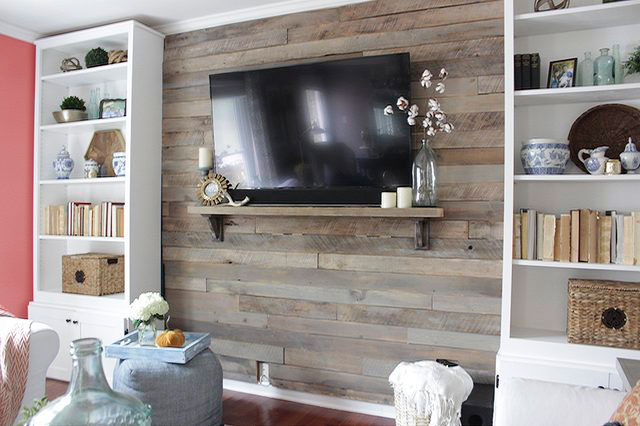
Next you’ll be connecting your wires to hang up your TV and then hanging it up on the mounting device. You can do a few things with the space under your TV to enhance its appearance. You can put up a shelf easily under your TV, making it look like it’s supporting it, and then put decorations up around the corners. It makes things look cozier.
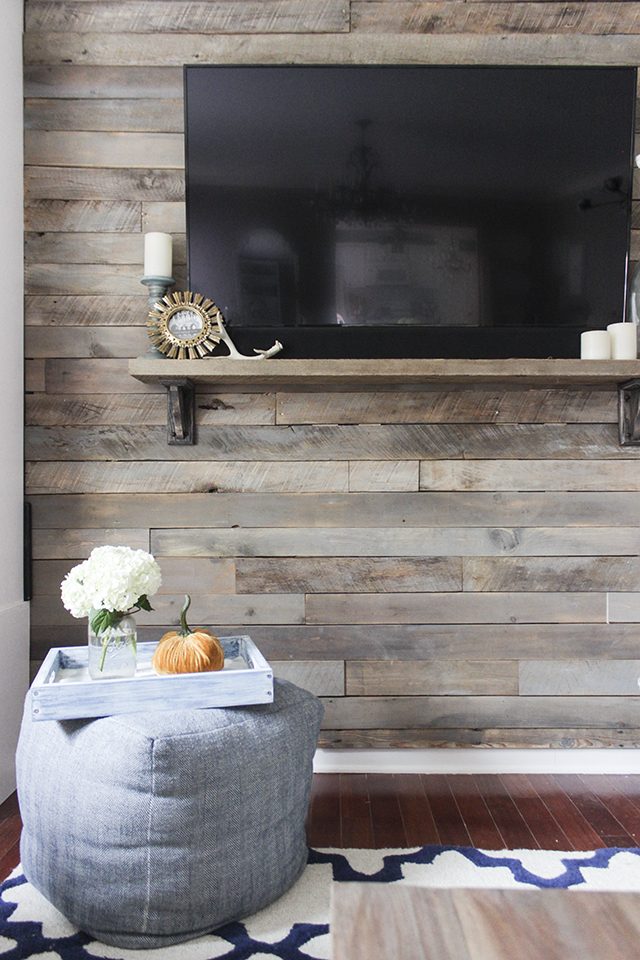
(Image: Shades of Blue Interiors) ©ehow.com
Part Ten: Enjoy
Decorate, furnish, and enjoy your awesome new wall. Have a movie night if you opted for the TV mount. We celebrated with Kung Fu Panda and Chinese.
Pallet Signs Project
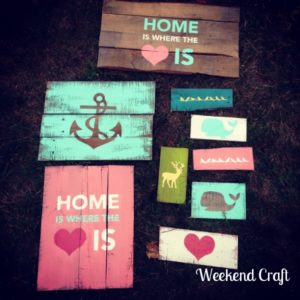
Pallet signs can be a pretty easy place to start when it comes to wood pallet projects. They’re fun, pretty easy to make, great for your house, and great as gifts.
Part One: Piecing them together
After you’ve cut down pallets (discussed above), you can lay out pieces that fit together and cut them down to the desired size.
©http://weekendcraft.com/
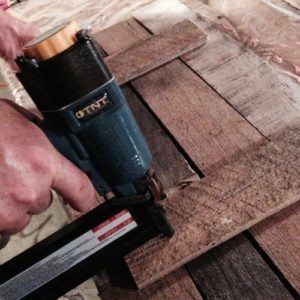
Then you need to lay out your two back pieces across the back to keep them together. Remember to nail down the boards at angles so that they don’t slip out as easily.
©http://weekendcraft.com/
Part Two: Vinyl, Silhouette, and mats
Ok so if you have a Silhouette then you probably know how to handle this part.
I, however, do not as of right now. So I went and borrowed my friend’s.
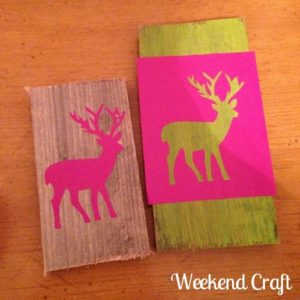
Mat can be an excellent material to work with for vinyl. You can buy the 12×24 mat on Amazon. You can run it through your Silhouette and it prints off the design for you to cut out.
You can also use other stencils to cut designs out of mat or other materials. It’s kind of just up to you and what’s easiest.
©http://weekendcraft.com/
Part Three: Painting
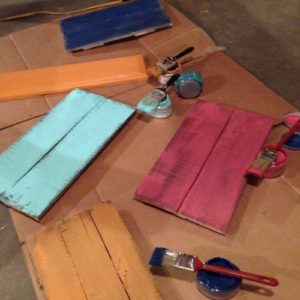
You can paint the wood before stenciling or with the stencil. Creative choice rules here. And it’s great because you’re not wasting material because you can use either of them. Get the most you can out of your cuts.
©http://weekendcraft.com/
Remember not to let the paint pool to decrease bleeding on the edges. You can always do a second coat of paint if you need it.
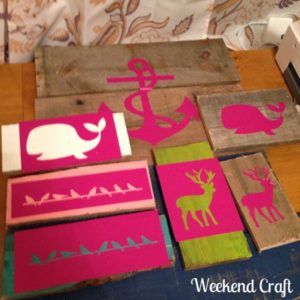
After about a half hour (when the paint is dry) you can remove the vinyl. You may need to do some touch up to make the image crisp.
©http://weekendcraft.com/
Part Four: Enjoy
And there you go. Your signs are ready to enjoy, hang up, and share.
Easy, fun, and therapeutic to do if you enjoy projects and like to keep your hands busy.
©http://weekendcraft.com/
Where The Wild Things Are Pallet Project
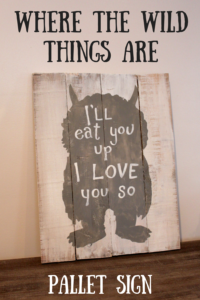
This is a great project if you’re looking to make something for a nursery or toddlers room. It’s themed after the children’s book Where the Wild Things Are. My sister is having a baby soon, and we both liked the look of this project for the little one’s room.
©http://weekendcraft.com/
Your starting team:
- Pallet boards (dismantled by crow bar or power tools)
- 2 colors of paint
- Paint brushes (both large and little brushes for the detail work)
- Monster stencil
Part One: Putting the pieces together
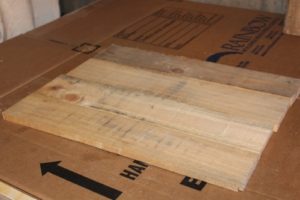
Equally cut four pieces of the pallet (14×18 is a decent size), and then cut a couple more pieces of the pallet for the back of the sign. Nail the couple pieces across the back of the four boards at an angle. Nailing them straight in can make the back easy to pull off.
©http://weekendcraft.com/
Part Two: Sand it down and paint
You can choose whether you’d like the smooth finish of the sanded look or not. And obviously you can choose however many colors you want to paint with. I stuck with two colors since I like to try to keep it simple for myself.
After looking around, I decided I wanted to go with the matte look and used Americana Décor Chalk paint to accomplish that look.
Part Three: Stencil time
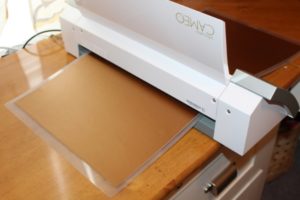
You can buy a stencil to use for the sign. If you don’t already have a Silhouette Cameo, that might be the better option because they’re around $250. The Silhouette Cameo will allow you to trace the monster in Adobe Illustrator and then send it to the Silhouette. I didn’t have the Silhouette, and I didn’t want to buy one either just yet.
I went to a Steam Roller copy center, printed it out, then cut the outline with a paper cutter knife.
You can transfer the stencil over either by hand or with transfer tape. Transfer tape can be pretty costly, so I would grab a helping hand to apply the stencil. In this case, I had my teen help me, and we did a pretty darn good job.
Remember to seal those edges up with a credit card or something so that the paint doesn’t bleed underneath.
©http://weekendcraft.com/
Part Three: Painting time
This part is pretty open to your creativity. You can paint the monster however you like. Again, after looking at some different options, I decided to get things looking rustic and rougher. I try to start from the edges and paint inward, avoiding pools of paint so that it doesn’t bleed through the edges. Then I left the paint kind of uneven and textured looking.
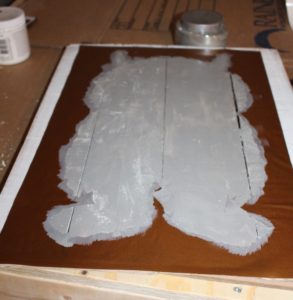
©http://weekendcraft.com/
After about ten minutes you can take off the stencil.
The next part is a little harder as far as detail work goes. My hand writing is not very nice. So it’s a bit harder for me to free hand something. However, my teenage daughter has beautiful handwriting. So together we were able to outline letters with a pencil and then paint over it with the detail brushes.
I think you could also do this easily with letter stencils if you have them. If not, you can buy them at a craft or fabric store like Joann Fabric and Craft.
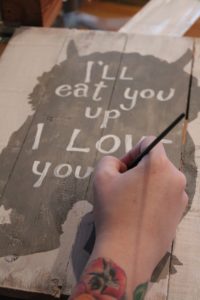
©http://weekendcraft.com/
Part Four: Ta Da
And there you have it. Very cute monster pallet board project. I really love the textured, rustic look on this one. It kind of fits with the monster theme.
It was also fun to have my daughter help me out with some of the project. Finished project + bonding time = success!
And it will mean more to my sister knowing it came from both of us, I think.
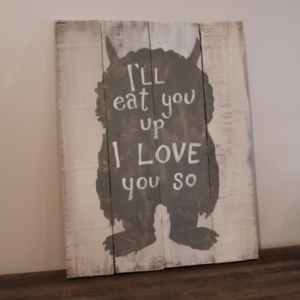
©http://weekendcraft.com/
Pallet Wood Hearts Project
I tried this one out for kicks and giggles, but I think it could be a good Valentine Day project to do with a group of friends or members of your family. It could also be a good gift or decoration for that day, or perhaps a wedding present.
Or…you know…for kicks and giggles.
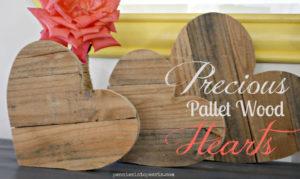
©http://www.penniesintopearls.com/
You starting team:
- Jigsaw
- Wood (for baking)
- Screws
- Saw
Pretty simple assembly.
Part One: Stencil time
You’re going to need heart stencils. This can be as easy as cutting out the shape and size you’d like your hearts to be. Now I’ve mentioned I’m actually not that talented at drawing and writing pretty, but the inaccuracy and rough edges just adds to its charm.
Imperfections are lovely.

©http://www.penniesintopearls.com/
Part Two: Cutting it down to size
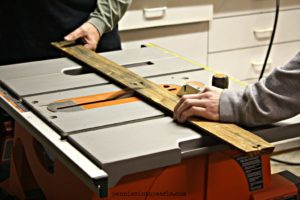
Next you’re going to cut both the wood you have for baking and the pallet wood a couple inches past the length of your heart (for wiggle room).
©http://www.penniesintopearls.com/
Part Three: Tracing and putting the wood together
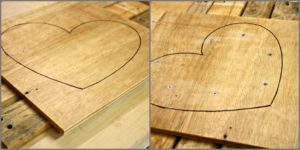
Now you’ll trace those heart stencils on those pieces of wood.
Put out the pallet wood in the order you want them to show up on the heart. Make sure to put the good side down. Then line the baking wood on top of the pallet wood and screw them together. You’ll want screws about ¾ the length of the thickness of those boards together, so that it’s long enough but not too long it’s poking out the other side.
©http://www.penniesintopearls.com/
Part Four: Jigsaw time and finish up
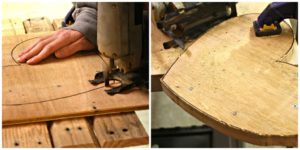
Cut out your heart along those lines with the jigsaw, sand the edges, and there you are—perfect valentine decorations.
Or rather, I should say perfectly imperfect in my case.
Of course if you’d like you can paint them. I painted mine with my kiddos, and they came up with some pretty cute googley-eyed creations that are going to be fun to put up Valentine’s Day.
©http://www.penniesintopearls.com/
Ikea Fjell Wardrobe Hack With Pallet Shelves Project
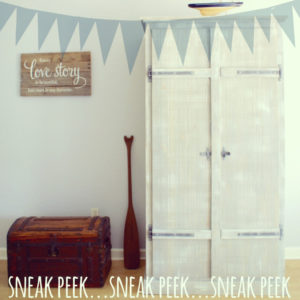
So this is a cool project if you’re needing some extra closet space. I was looking for a way to manage my teenager’s closet better when I ran across this project. And I can tell you it looks and works great (and she loves how it looks in her room).
I bought the Fjell wardrobe from Ikea. It’s beautiful with its solid wood structure and it has more than enough space.
But of course it would need more shelves.
But first…
©http://www.thinkingcloset.com/
Part One: Painting
We needed to paint the wardrobe so that it would match my daughter’s bedroom. It just so happened she loved the texture and paint job on the one we found, so we imitated it for her bedroom.
We did a faded gray wash, which is made by putting gray water-based latex paint, white paint, and water. We followed their ratio of water to paint as well (2:1) and it worked out great!
Then we took a sponge and wiped it over the wardrobe with the grain, then followed it with a rag and wiped a lot of the paint off. This tones down the very cabin-woodsy tone of the wood, but allows you to still have that pretty wood look.
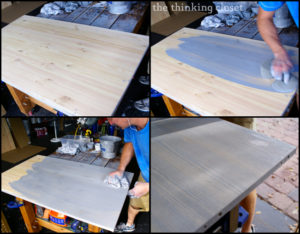
©http://www.thinkingcloset.com/
Next we did dry-brushing—getting the tips of a dry brush with white paint and then brushing against the grain. You can get an authentic older look by going heavier in some parts and lighter in others.
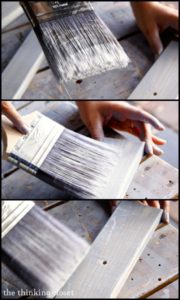
©http://www.thinkingcloset.com/
We spray-painted the hard-ware to a similar color then also went over it with the dry brush so it would match the rest of the wardrobe.
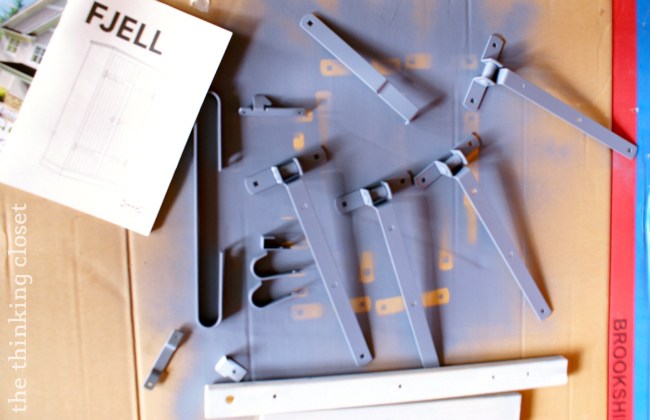
Part Two: Assembling the wardrobe and building in the back
Next we assembled the wardrobe in her room (we only made a couple mistakes as we went through the assembly—it happens!).
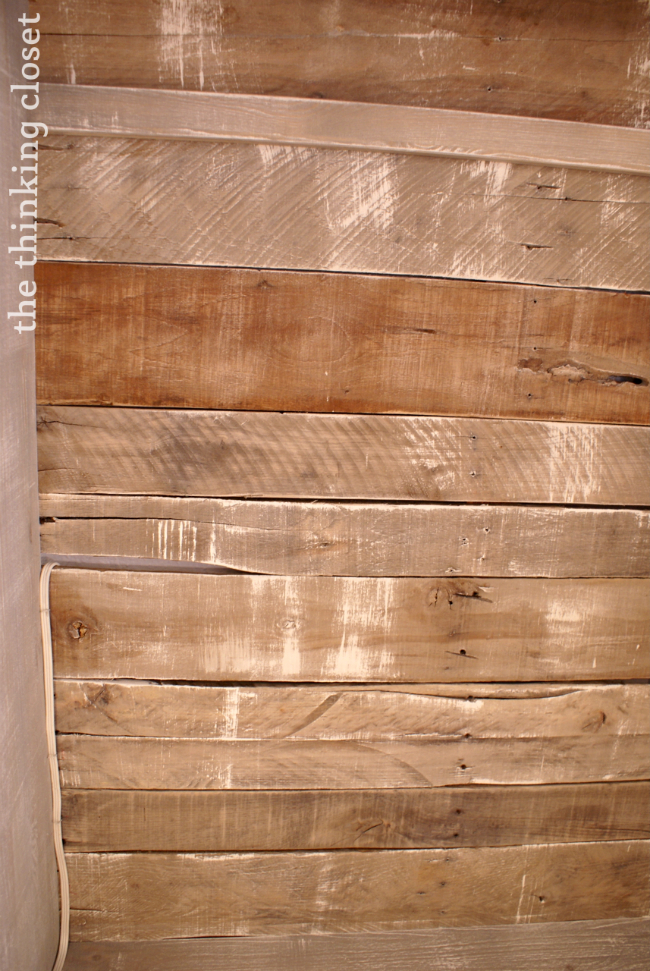
We opted to get rid of the fiberboard at the back and fill in the back with pallets.
We cut the pallets down to size so it could fit on the back. Then we cleaned the boards and sanded them down really well so that they wouldn’t snag clothes or fingers.
After smoothing them out, we white-washed them with the dry brush and attached them in with 1 ¼ wood screws.
Note: Pre-drill oak pallet boards (as opposed to pine) since they are usually soft enough and won’t split.
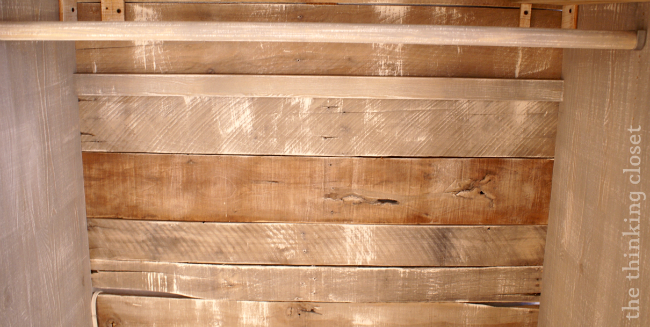
If you would like, you can also reinforce the floor of the wardrobe. You can do this by putting 2×4 chunks of wood in the middle underneath the floor.
Part Three: Putting in the shelves
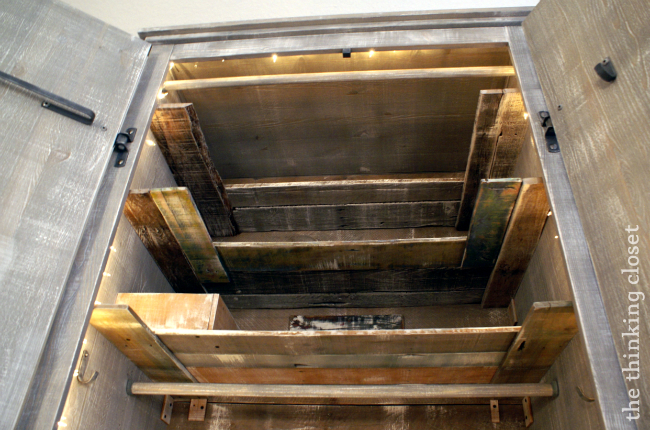
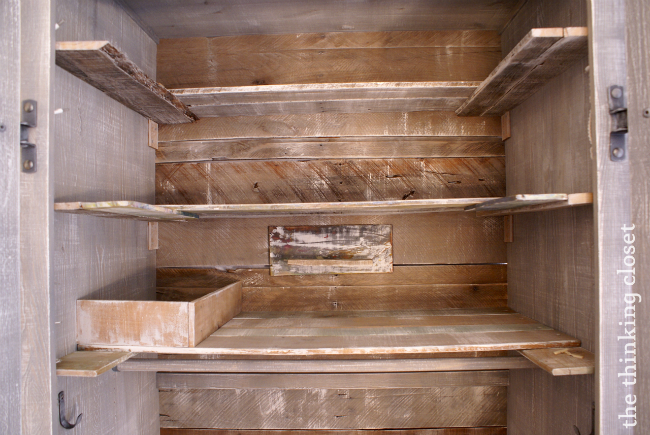
You’re basically going to terrace the shelves, making the top one the shortest and the bottom one the longest, making the most of the deep shelf space. At least this is what we did. The idea being that the high shelf space is more useable that way and you can access the things you’re stuffing back there.
©http://www.thinkingcloset.com/
You can create shelf space by drilling some holes into the sides and back and attaching parallel boards. The of course creating the shelf space by drilling the boards together after cutting them to the exact width they’d need to be to fit.
©http://www.thinkingcloset.com/
Part Four: Lights
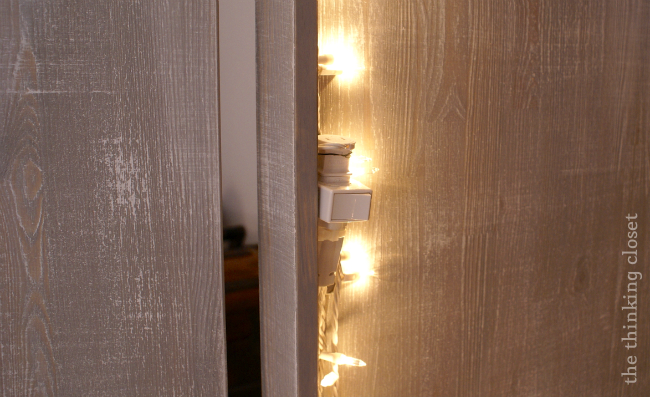
And we opted to hang up white string lights along the door ledge to give the wardrobe some light. And it’s a cute touch. You can just run an electrical cord down the side and out the back through a small crack in the pallets.
©http://www.thinkingcloset.com/
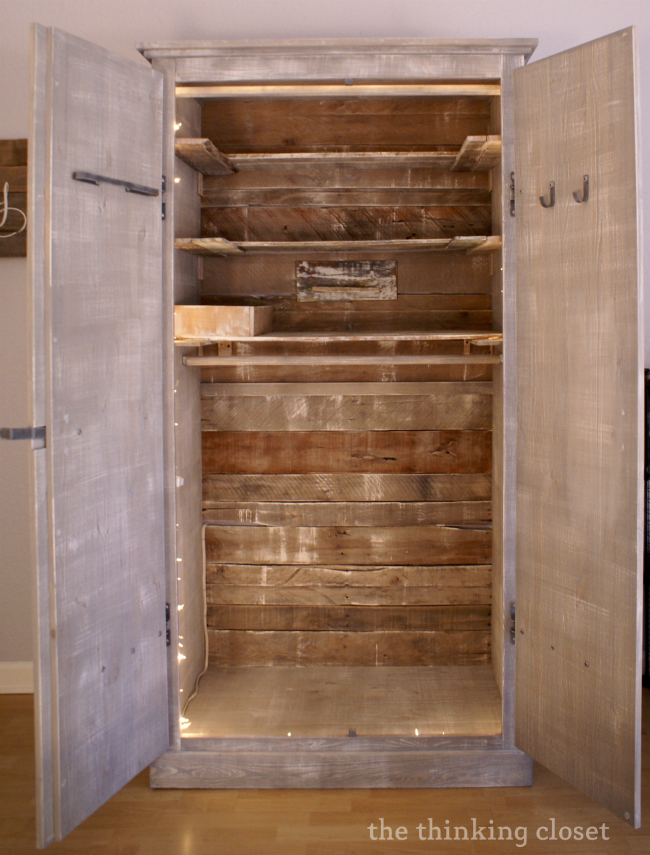
©http://www.thinkingcloset.com/
Part Five: Action
And there you go.
Isn’t it beautiful? We love how it looks and it adds so much more space to the wardrobe.

©http://www.thinkingcloset.com/
Pallet Bookshelves Project
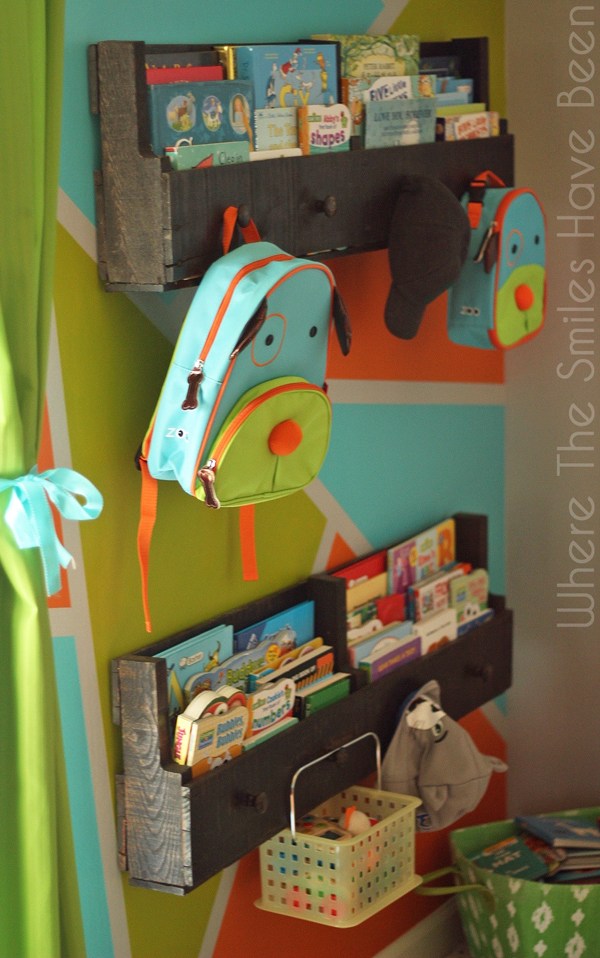
These shelves are super cute and can really be done anywhere in the house, but I chose my toddler’s room because her little books are everywhere all the time.
Now this is a pretty easy project, but life can get in the way, so it actually took me a couple weeks to get done with everything. I started off well, but then I had to go into work more or the kids got home earlier some days or the toddler wouldn’t let me work in peace. It happens. Don’t get discouraged.
Heck, you don’t even need to finish all your projects.
Just try your best and make sure it stays fun for you!
Your starting team:
- Pallet
- Stud finder
- Level
- Work gloves
- Glue and felt scraps
- Stain
- Disposable gloves
- Safety glasses
- Foam brush
- Rag
- Drill
- Screws
- Hammer
- Wall anchors
- Orbital hand sander and sanding disc
- Reciprocating saw and 12 in. blade
- 8 wood knobs
- Polycrylic and paintbrush
Part One: Taking apart the pallet
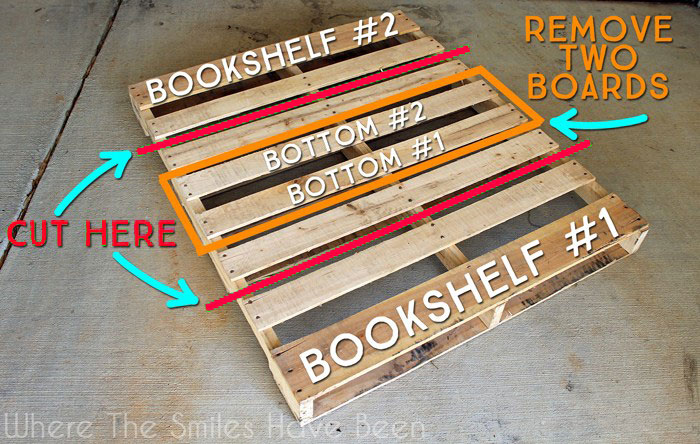
Use the reciprocating saw to cut along the green lines shown in the picture below. This result in three small cuts on both ends of the pallet. This is going to be your basic idea of the book shelves.
Then remove two boards from the center of the pallet. These will be screwed onto the bottom of the other pieces so that your books don’t fall through!
And like I’ve said before, you can try to take apart the pallets manually. But it is so much easier to do with a saw. Just cut right through the nails.
And this is about what I had done for a week. Like I said, it happens!
http://www.thinkingcloset.com/
Part Two: Sanding
Use your orbital sander for the majority of the wood then go back and finish up the harder to get areas by hand. This is going to make your boards look cleaner as well as make them safer by getting rid of the sliver and scratch risk.
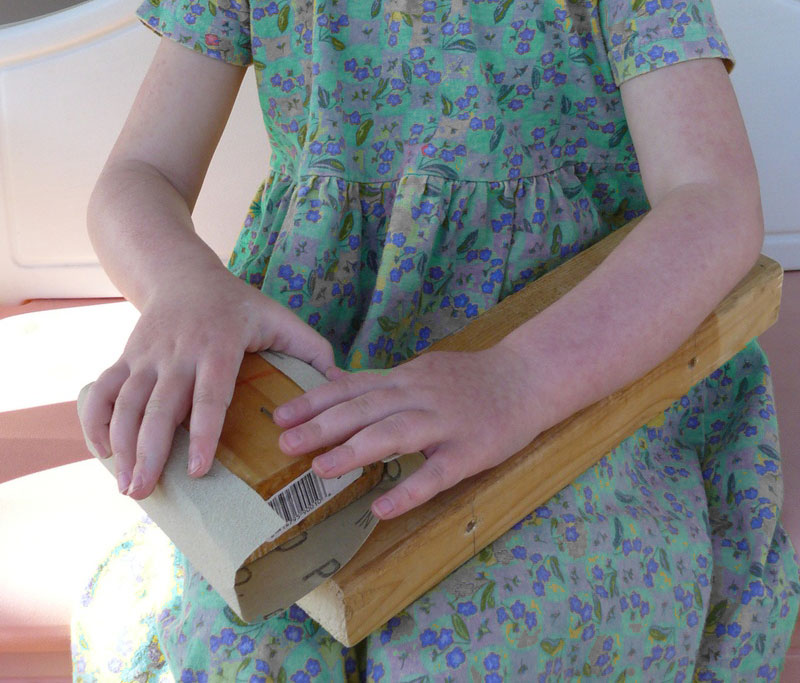
My little girl helped with the sanding. It was pretty cute to give her a little block and some sandpaper and let her contribute. She was so excited to “be just like mommy!”
This is also why some projects take me longer. But it’s so worth it to me to either never finish them, or maybe not have them done as evenly simply because my kids are learning and growing with me.
And we’re building great memories.
Part Three: Staining and sealing
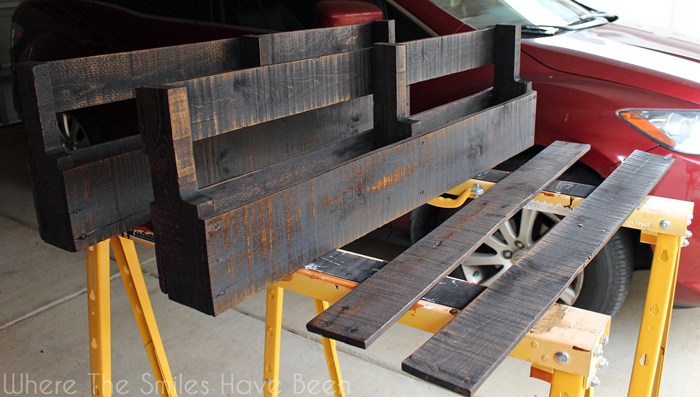
Use your disposable gloves and apply the desired stain to your wood with a foam brush. You can also wipe the stain away with a rag after some minutes. You may need to apply a couple coats because the wood soaks the stain right up.
Let the stain dry a couple days and then apply polycrylic to everything in order to seal them up and give them some shine.
http://www.wherethesmileshavebeen.com
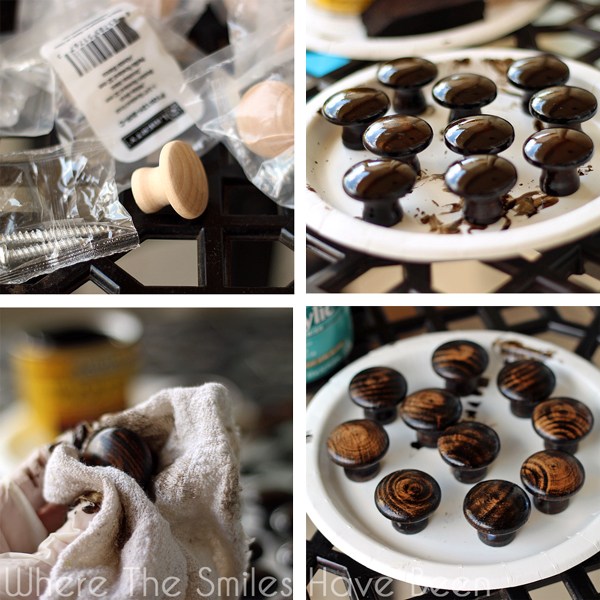
We also decided to put some knobs on the shelves so things could be hung off of them. You can buy several knobs for cheap at Home Depot. And then you just sand, stain, and seal these as well.
(I procrastinated running in to Home Depot for a while but finally got there. Can you tell I was kind of struggling this week? Ha ha ha.)
http://www.wherethesmileshavebeen.com
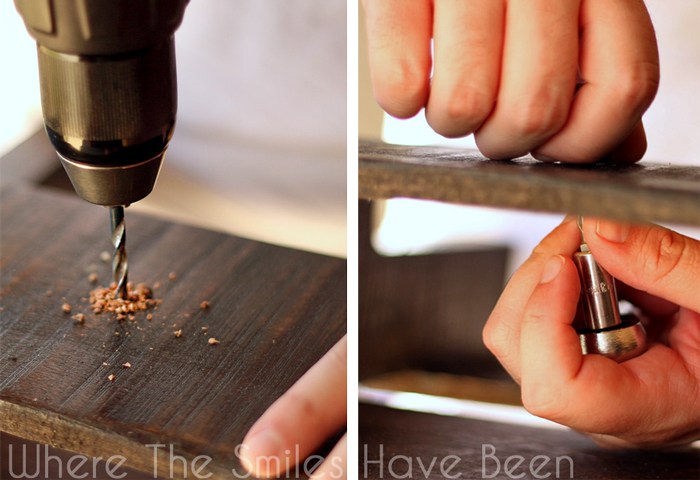
Simply measure and mark the knobs on each shelf, drill holes for them, and screw them in. Easy-peasy.
http://www.wherethesmileshavebeen.com
Part Four: Bottom boards and felt bumpers
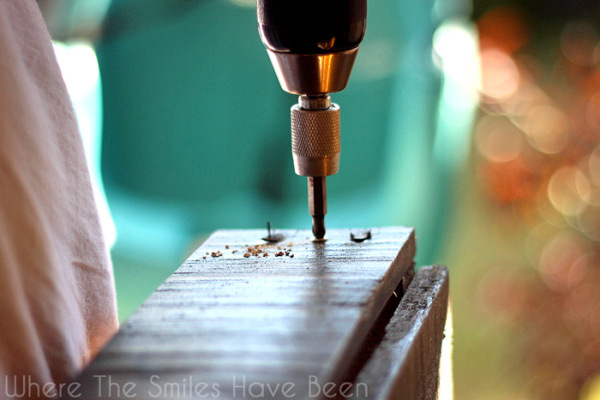
This is also super simple. Just attach those other boards to the bottom of your shelf and screw them in.
http://www.wherethesmileshavebeen.com
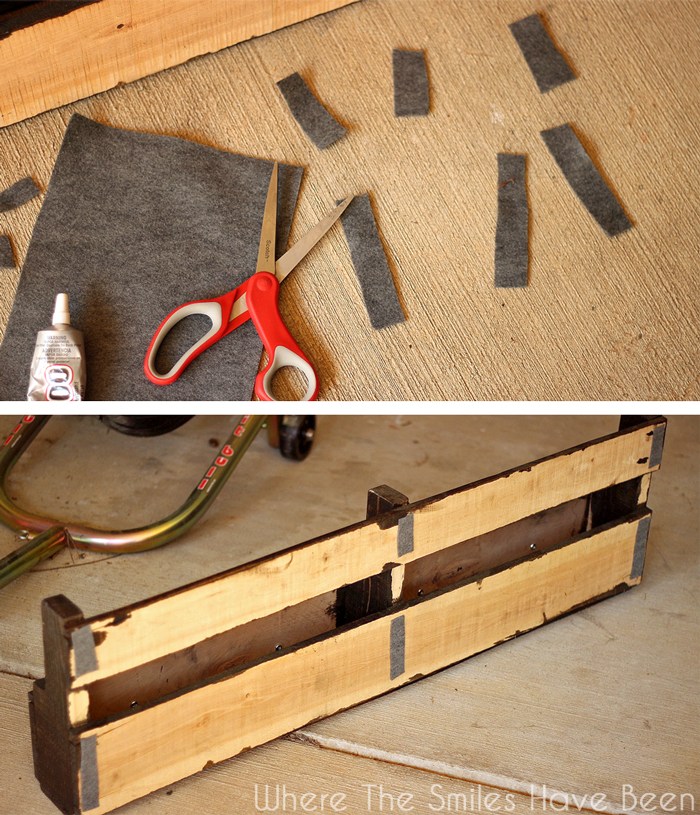
You can also glue felt to the back and the back nail heads to add some protection for your wall.
http://www.wherethesmileshavebeen.com
Part Five: Stud finding and hanging
Use your stud finder to hand the shelves over studs. If they don’t fall in the right place, and you have to attach them to drywall, then you could always use anchors.
If you used studs, you can screw the shelves straight in! That worked out for me! (Yay, easy stuff!)
However, if you have to use the drywall anchors it’s a little more complicated (this is where we don’t judge you if you simply move the shelves into another room or decide you wanted to give them away as gifts anyways).
This is a two-person job. I had my husband help me with it when he got home one night while the kids were watching a movie. Sometimes that one-eyed babysitter is super helpful.
Line up your shelf with where you want it and make sure it is centered and level.
Drill through the center of the left-top board and straight into the drywall. Repeat on the right side. This means that your shelves are attached with two screws and will ensure the shelf and wall holes are lined up.
You can set the shelf down now and then hammer in your drywall anchors into those newly drilled holes. Then you can drill the screws halfway into each hole that you just drilled into the shelf.
At this point, you can pick the shelf up and align the screws in the shelf with each wall anchor and then drill them in the rest of the way.
Part Six: Enjoy
And there you go! Your shelves are ready to have books and stuff in them. Mine look super cute on the wall of my toddler’s room, and she seemed really into them too. She was putting books and a few toys in and out of them for an hour.
Pallet Clock Project
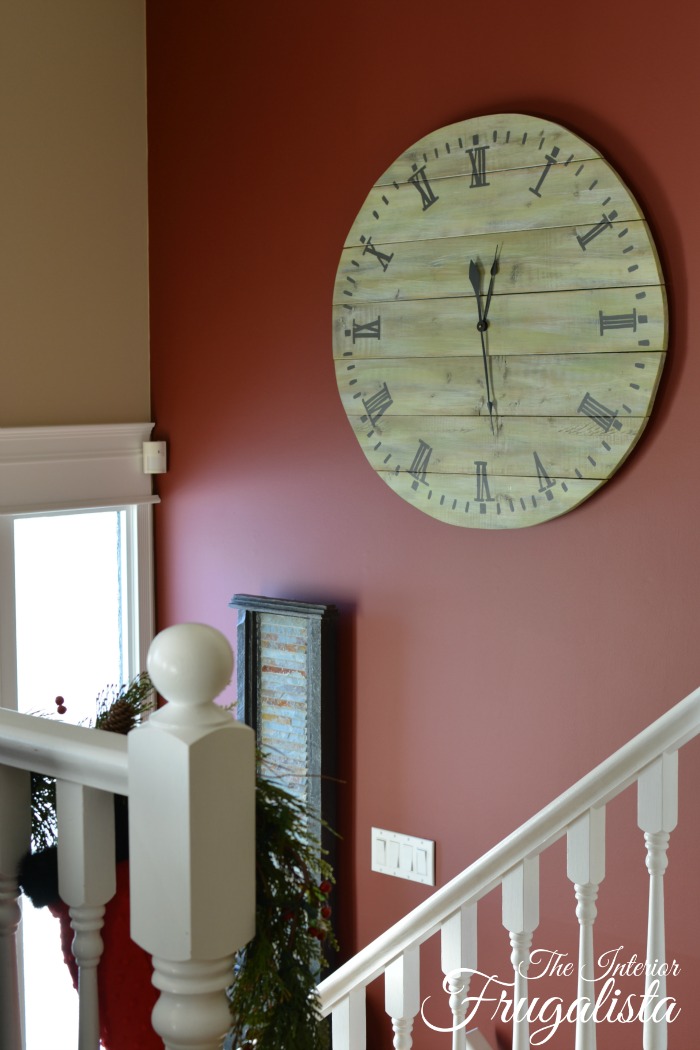
When I ran across this project it was listed as an idea for fence panels. So that could be a cool idea. However, this obviously works just as well with wood pallets.
This project could be a super cute gift or a great decoration for your own home. I hung mine in the hall by the front door because I had the perfect space for it, and it makes our home look that much cozier and welcoming.
http://www.practicallyfunctional.com/
Part One: Cutting down to size
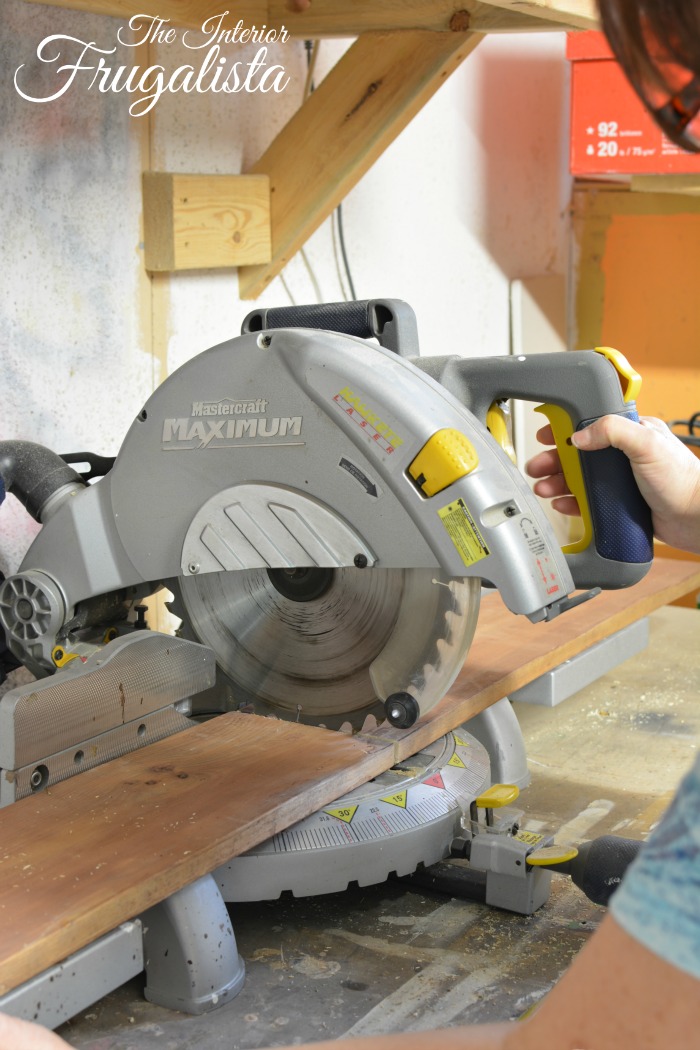
First you want to cut your pallets down to size (I did about 24 in.).
http://www.practicallyfunctional.com/
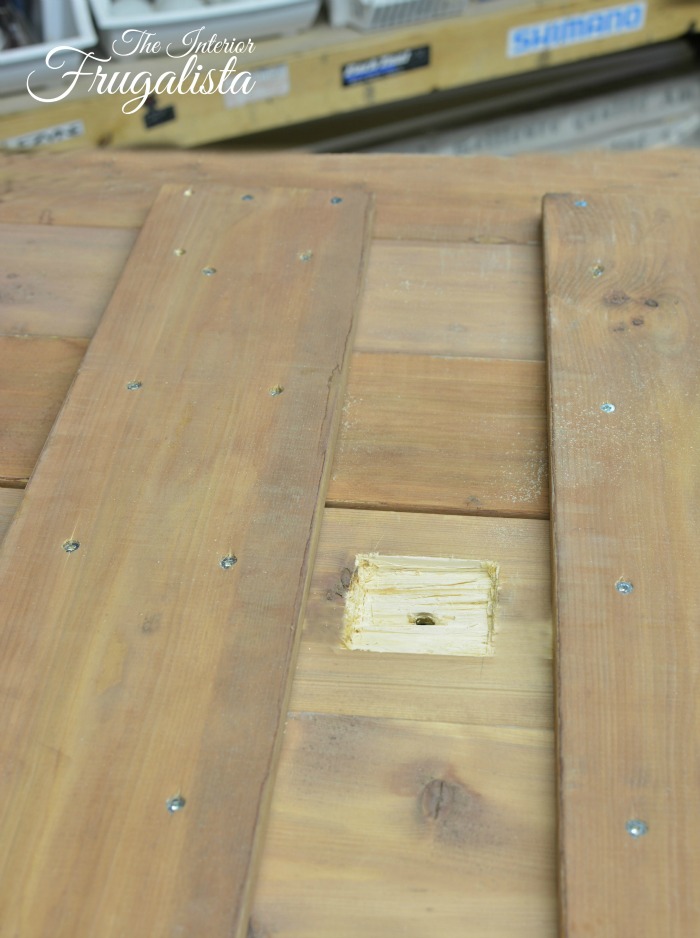
And then you want to screw a narrow board across the middle to keep them together.
http://www.practicallyfunctional.com/
Part Two: Stencil, cut, and sand
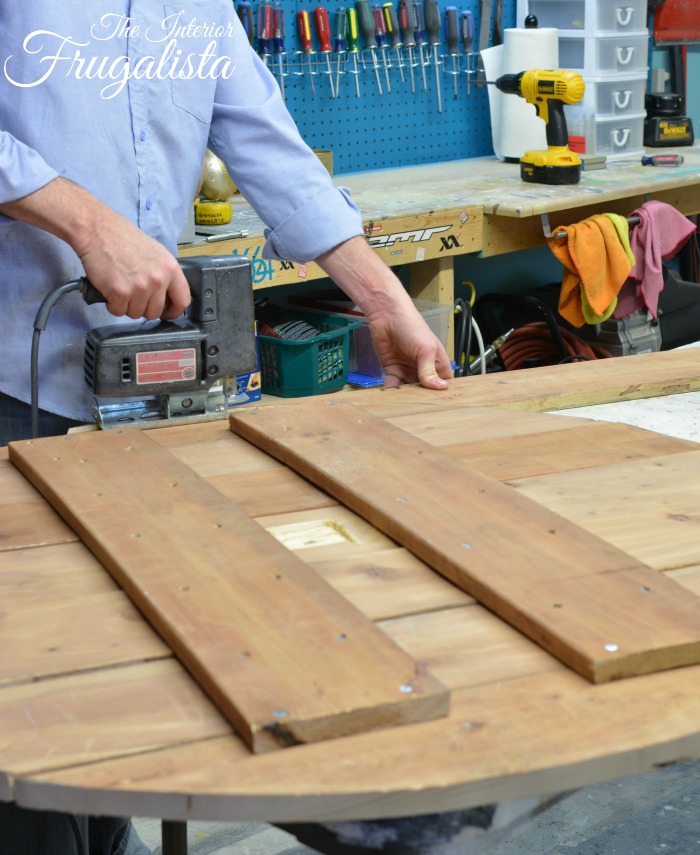
Then you want to stencil a circle onto the board. You can do this with your own cut out. I didn’t want to rely on me just eyeballing a circle though, so I went and got a big dish to trace onto my board.
You cut this out all easy-peasy and then add a couple more supports to your back to keep them all together.
http://www.practicallyfunctional.com/
And then you’ll sand your shape down and make your clock all clean and smooth.
Part Three: Painting time
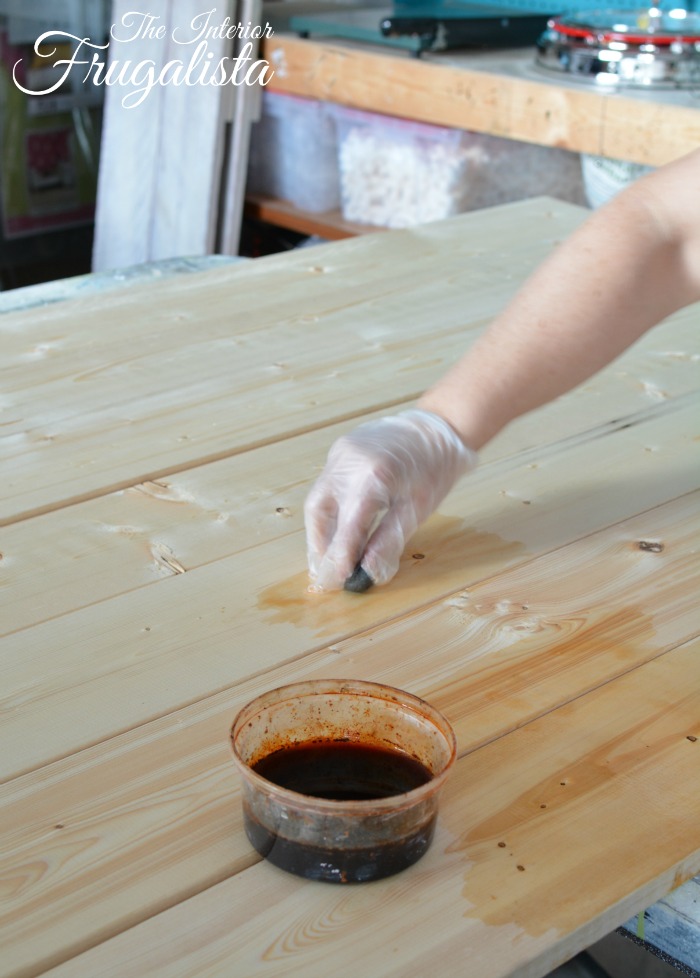
Next you can paint the clock and its number whatever colors you would like. I just used some of my grey/green chalk paint and did black lettering. I also aged the clock face before painting.
Now the numbering is a little more complicated.
You want the numbers to all be in the right place otherwise your clock will be wonky and won’t tell the right time (which may be just fine if that’s the look you’re going for—no judgment).
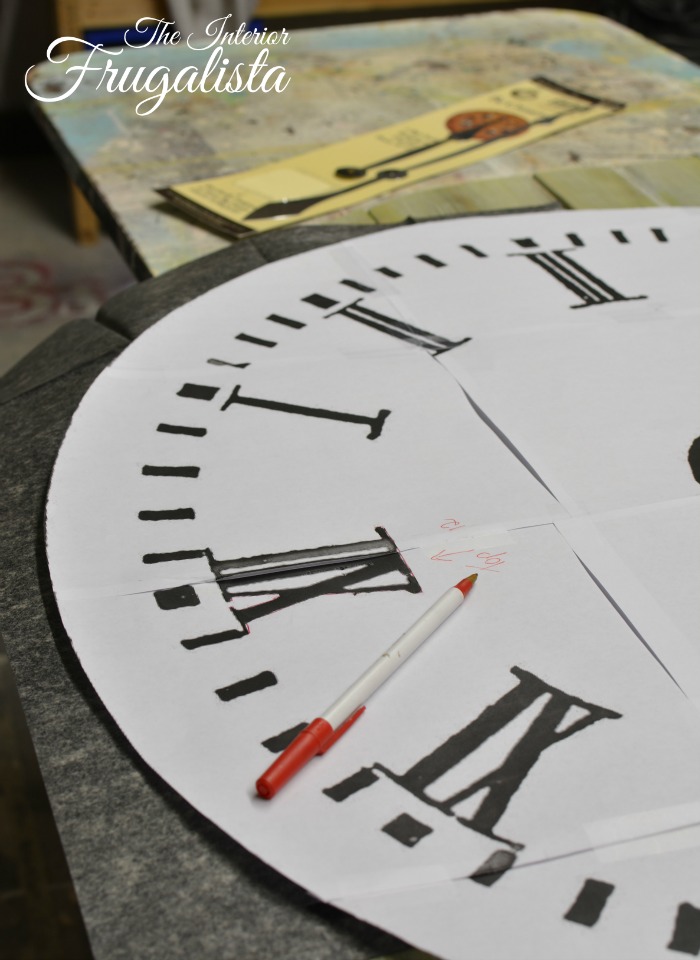
So you’ll want to measure to find the exact center and then line up the 3 and the 9 and the 6 and the 12.
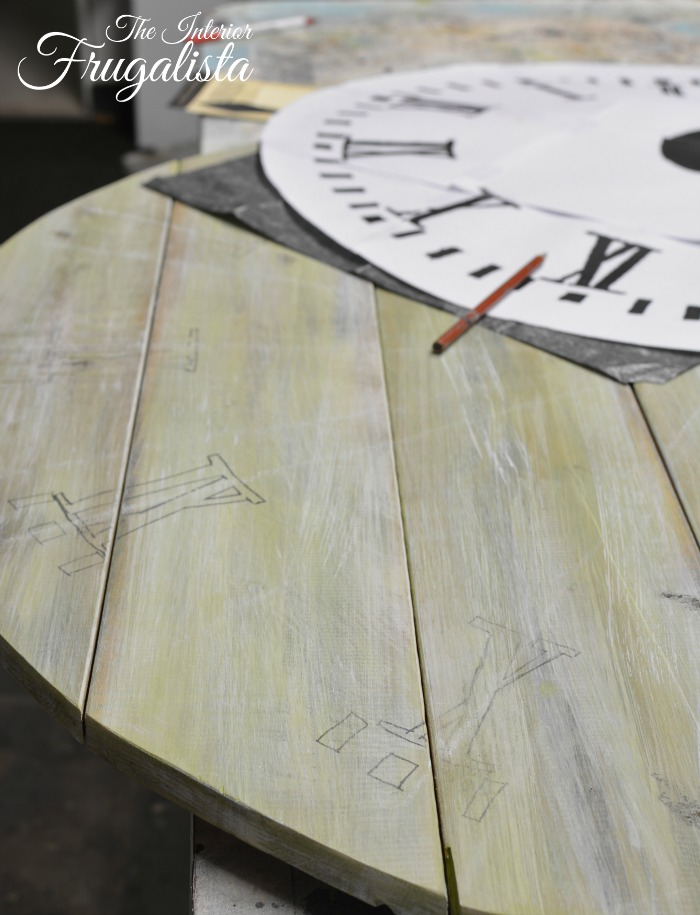
Or, you can just find a graphic online and trace it directly onto your clock face
Painting them was a piece of cake from there.
http://www.practicallyfunctional.com/
Part Four: Clock face
I made my clock about 20 in. in diameter, and I purchased 9 in. clock hands. You might have to do some shopping around for cheaper clock hands if you’re really looking for a budget. Different places have discounts on and off. I ended up getting a pretty decent deal on amazon (free shipping with Prime).
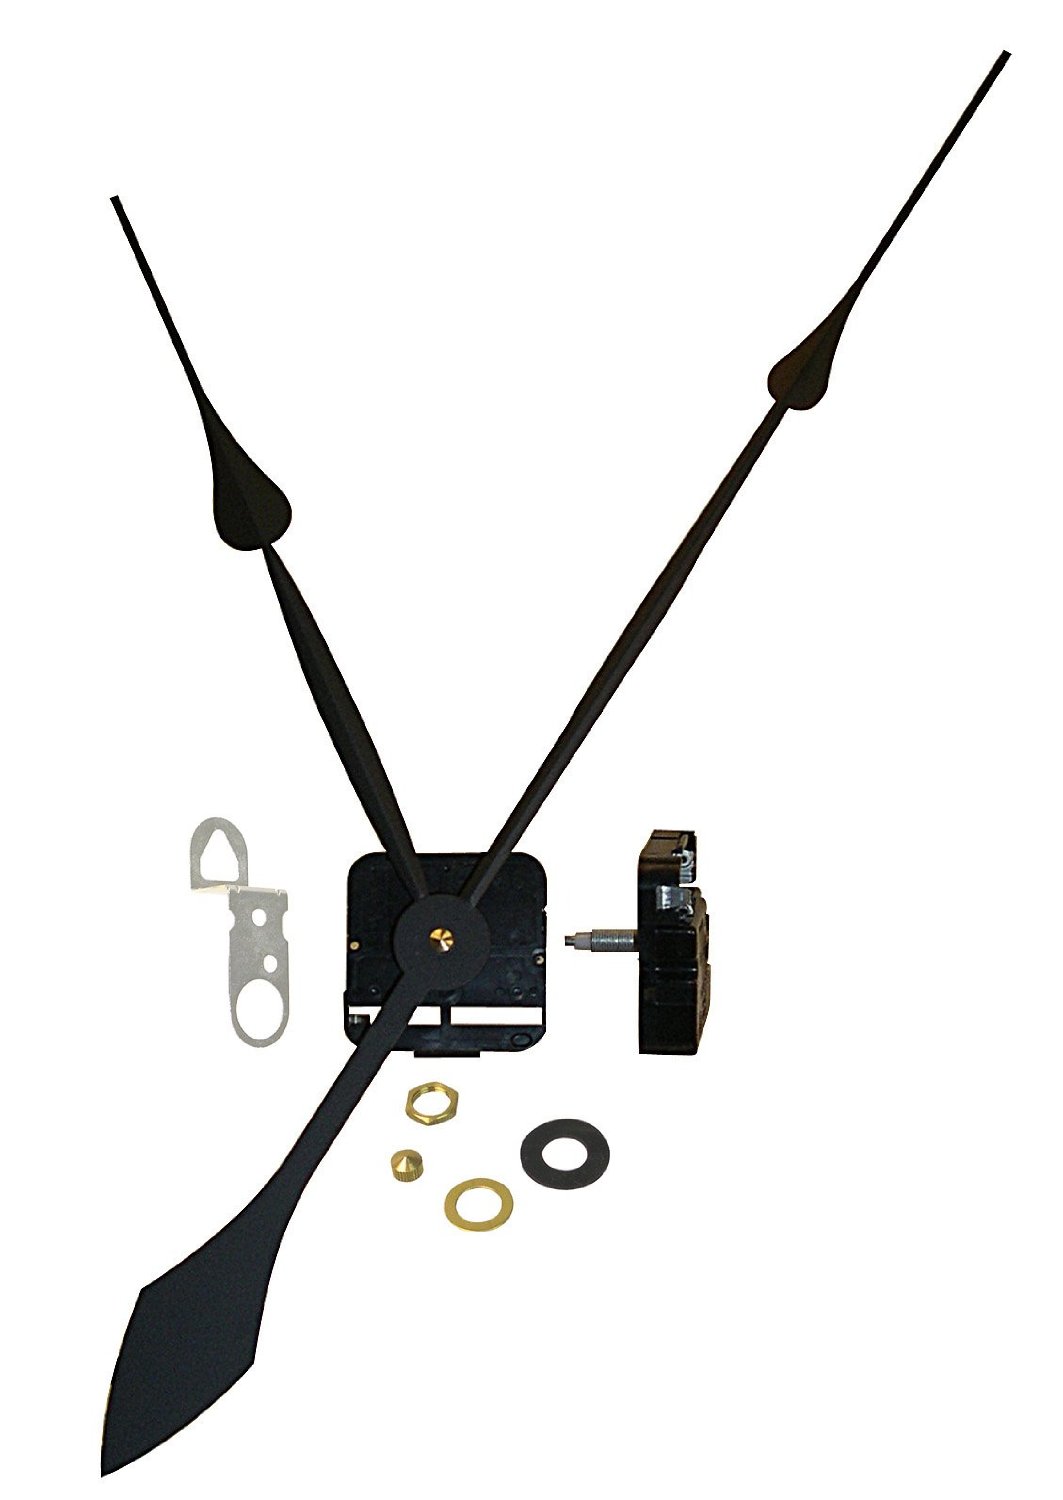
You can use a paddle drill to make a hole in that exact center mark you made earlier.
If you have some issues with the clock keeping time, it may be because your boards are too thick or the shaft isn’t long enough. Simply carve out the area where movement occurs in the back of the clock. Basically you make it so the shaft can extend further through the face.
Part Five: Enjoy
Hang up this pretty thing pretty much anywhere. It’s a fun thing to have around and a pretty fun and simple project.
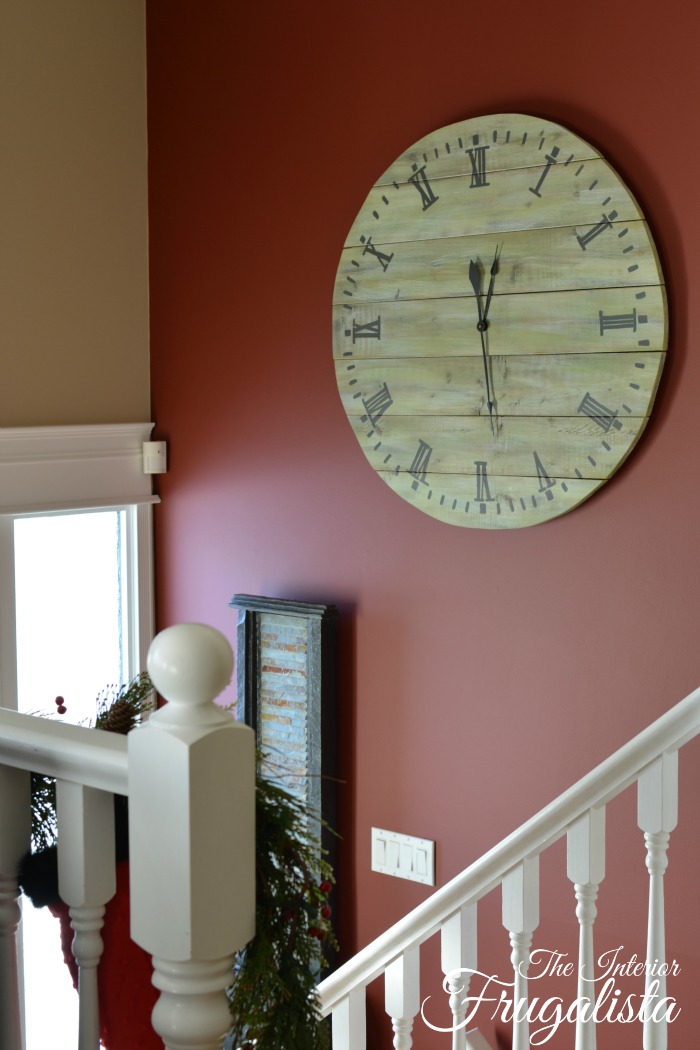
http://www.practicallyfunctional.com/
Flower Planter Pallet Project
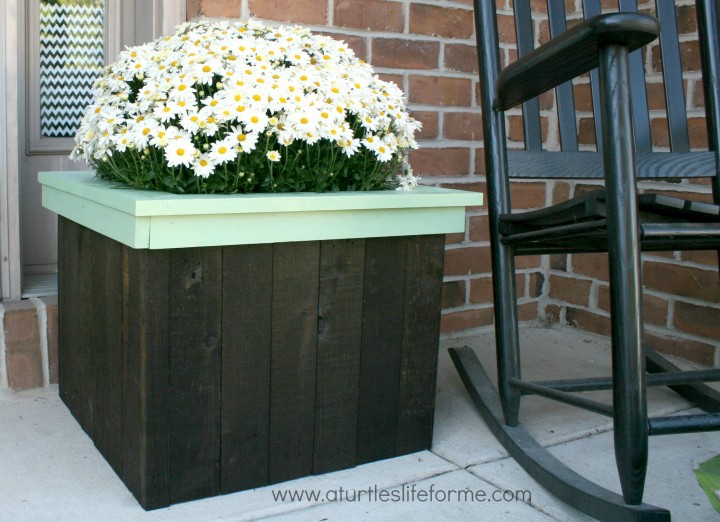
I love these! I added them to my back patio as soon as I was done and couldn’t wait to go shopping for flowers to fill them. Now they’re gorgeous sitting back there. I like the planters so much more than any of the plastic crap you can buy. Not to mention the price is oh-so-much-better.
Part One: Taking it apart, putting it back together
Cut down about 16 pieces to 17 in. long and make four squares out of them by nailing them together (tip: maybe use wood glue in addition to the nails to make sure they stick). Each planter is going to need two of these—one for the top and one for the bottom.
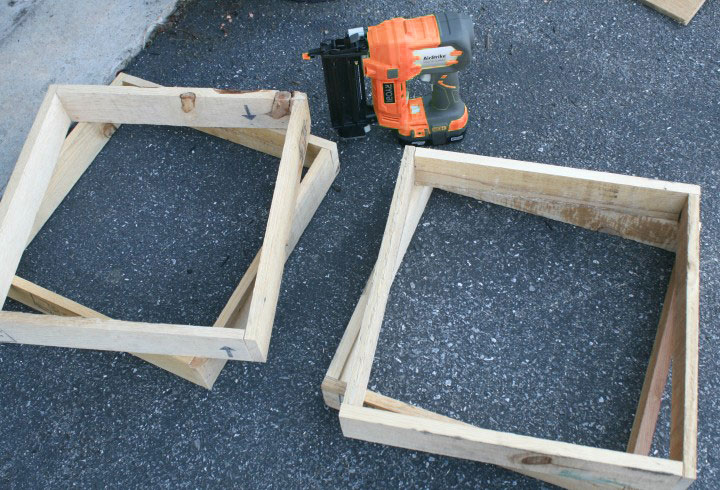
Cut the rest of the pallet into 16 in. strips that you’re going to be using for your sides.
You can sand your pieces of wood down if you’d like, but since this is an outdoorsy thing I left my rougher.
Lay two squares on their sides and place the side pieces in place and nail them down (remember you can use that wood glue for extra support).
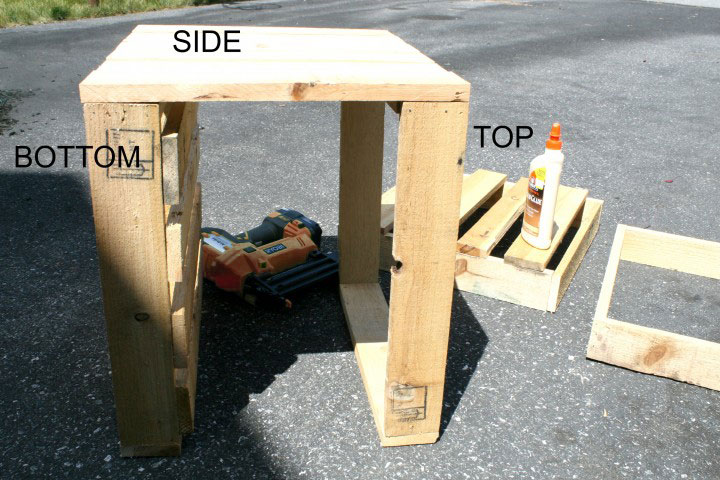
Part Two: Stain, seal, paint and the trim
You can use whatever stain you’d like or even just paint the whole thing. This is all up to your creative genius. I used a dark stain and dark green trim on the top.
You’re going to want to miter the edges of the trim for nice angles. Put the trim on the box after you’ve got it all painted how you like.
Part Three: Buy plants and enjoy
These come together really fast and they’re really cute. And flower/plant shopping is always fun (my favorite part of this project)
Raised Pallet Garden Project
This is a great spring time project. I started working on this about a month ago and have finally gotten around to finishing it.
I went and bought fresh pallets for this project since I’ll be growing my food in it. I’m pretty sure the HT stamped boards would be fine. But I just tend to error on the side of caution.
Your starting team:
- Pallets
- Top soil
- Plants to be planted
- Weed/garden fabric
- Scissors
- Staple gun with staples
Part One: Garden fabric
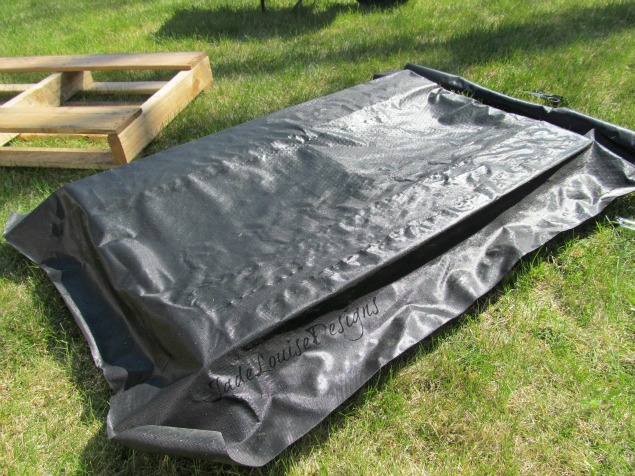
Turn your pallets over and measure out the garden fabric to put over the back. You will want to cover the ends and overlap at the top. Staple the fabric to the back of the pallet. You can start with the outer edges and then work your way in over the main center.
http://busycreatingmemories.com/
Turn the pallet over and staple it all the way to the top. This will keep the dirt inside the pallet, and when you are done only the top should be open so you can put dirt in.
Part Two: Placement
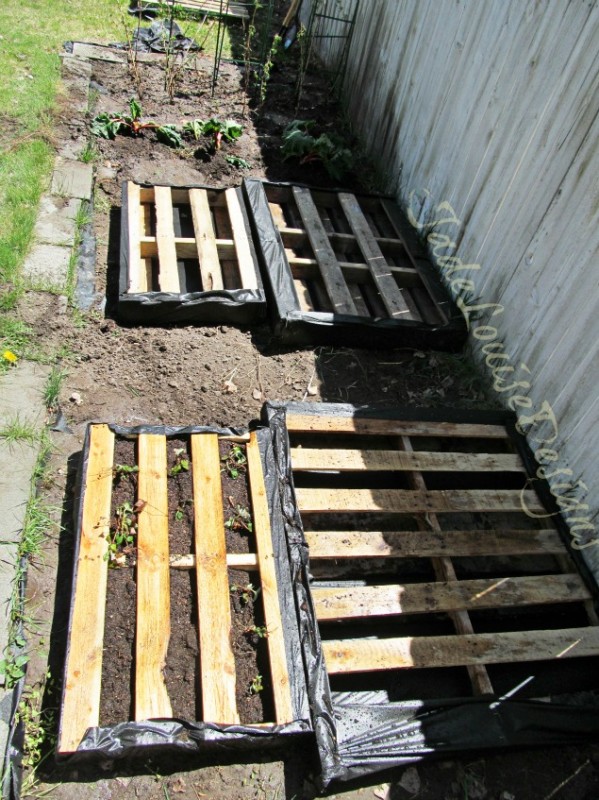
You’ll want to make sure that you have the beds where you want them before you fill them because they get HEAVY.
Lay them out in different places to get a good feel. Also, remember the lighting/sun needs of the plants you are wanting to grow there and plan accordingly.
When you have them where you want them, fill them up with top soil.
You can also measure and dig up a small hole to set the pallets in before you fill them so that they are more ground level. You can cover up the garden fabric and make it look more level.
http://busycreatingmemories.com/
Smaller pallets take about 2 bags of 1 cubic ft. top soil. For the larger pallets, you’re looking at about double the amount.
Part Three: Planting time and enjoy
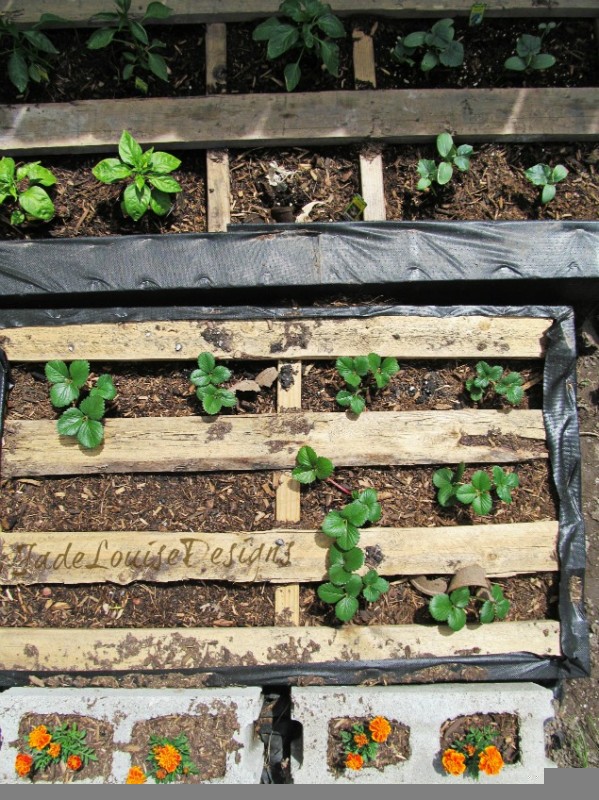
Now you get to plant your babies in there. (Plant babies that is…though my toddler did think she wanted to sleep there when I finished. Hilarious). I chose to do more veggies and herbs such as chamomile, mint, basil, radishes, jalapenos, and celery.
Remember you don’t want to plant things with deeper root systems such as potatoes or carrots. Pallets only allow for more shallow root systems.
Nothing like being able to go out and pick your own garden-fresh food!
http://busycreatingmemories.com/
Strawberry Pallet Planter Project
This project is similar to the other planter project, but it’s much more for if you’re wanting to go cute with things.
And they are cute. They are stable, durable, and aesthetically pleasing. By far one of my favorite planter-type pallet projects.
As with all pallet projects, make sure your pallets are marked with HT. Otherwise they could have been sprayed with chemicals and other such crappy things. And if you want, lean on the side of caution with food and just go buy some $5 pallets.
Your starting team:
- Pallets (6-9 plank ones for this project)
- Hammer or electric drill
- Nails (4 cm. and 8 cm. OR 1 5/8 in. and 3 in.) OR Screws (same lengths as nails)
- Hand-saw or jigsaw
- Paint and paintbrush (optional)
Part One: Cutting it up
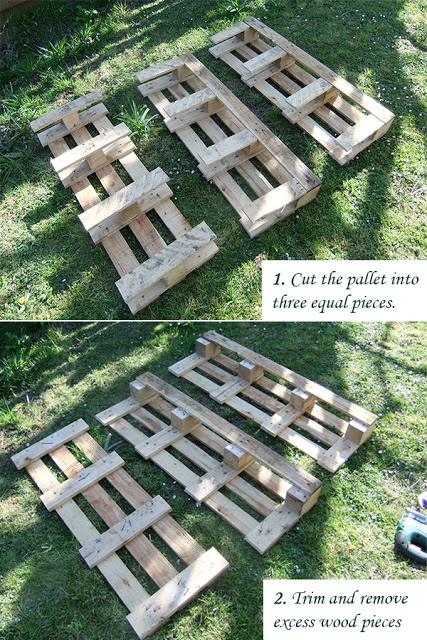
The idea is you want the pallet cut up into chunks of three (thus the 6-9 planks as a suggestion because they are divisible by 3).
Now you want to trim things up a bit. You have extra pieces of wood everywhere you don’t really need.
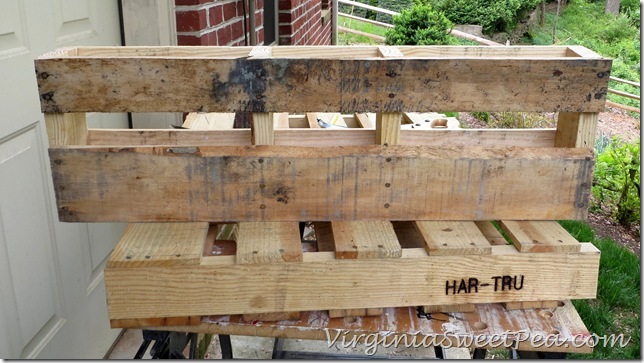
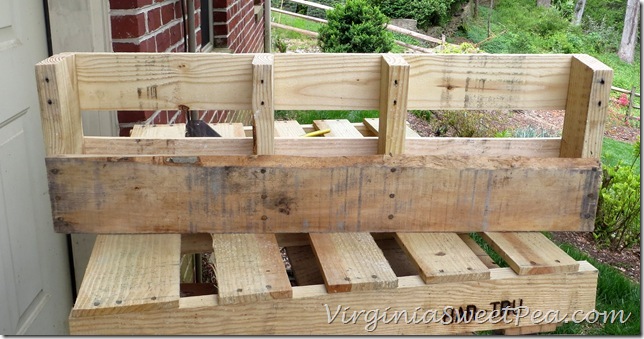
So two of these pallets are going to be formed from the top and the bottom of the pallet. You want to trim off the excess wood sticking up on these chunky blocks that are fixed on them (see image).
The pallet that made up the center will also have these blocks. Take them off but keep them handy because you’ll use them later.
Part Two: Fitting it together
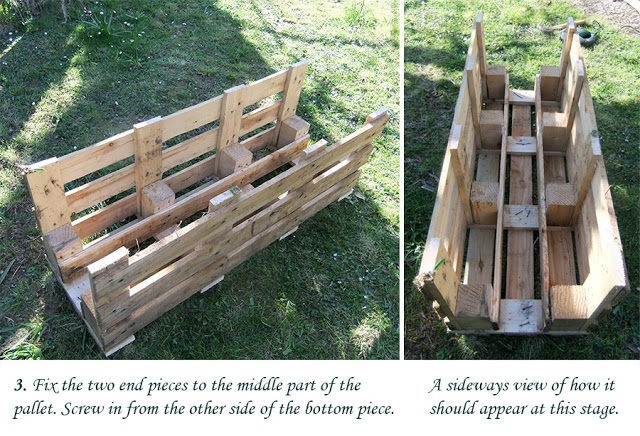
Put the two end pallet pieces against the middle pallet. Screw/nail the bottom piece into the blocks that are still on the side pieces.
Again, see the image because it’s weird explaining it.
Seriously, reading this the first time through just had me confused with how things were stated. I’ve tried to make things more clear and concise. If you’re struggling, the pictures really helped me out.
Remember, not everything is perfect. It’s ok if it takes you a little longer or faster. Doesn’t matter.
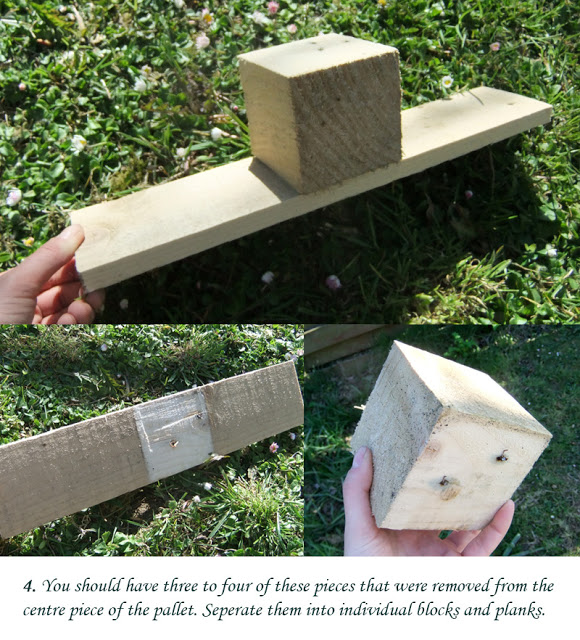
Next, take those pieces that we set aside from the center part of the pallet.
You want to take out or hammer down any nails that are sticking out.
Splitting wedges (and a mallet) can be helpful in separating the block and plank, severing the nails in two. Pulling it off with the back of a hammer might cause the wood to split.
Part Three: Putting it together
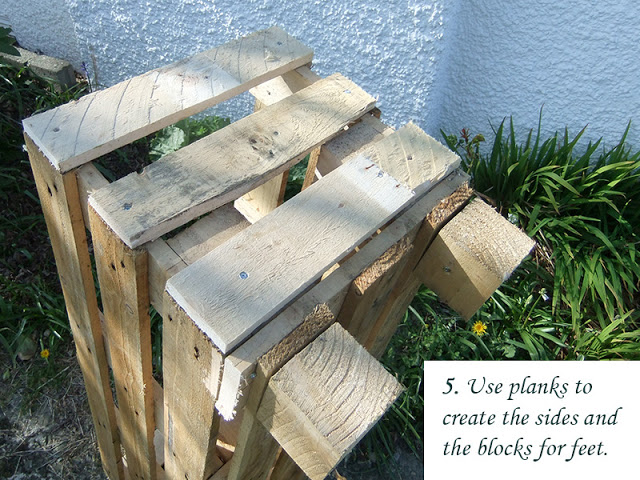
Now that you have those sorted out into blocks and planks (about 3-4 pieces), use them to create feet for your planter.
You may have a smaller pallet, which means you might only have 3 instead of 4. This just means you’ll have to dig around in the scrap pile for the extra one. That or you can remove one of the inner blocks from a side piece.
Part Four: Filling it in
After you’ve made certain it’s sturdy and there aren’t bits of wood sticking up in odd places, you can paint it if you’d like! That’s the fun part. Just remember to use outdoor paint and non-toxic.
Now you need to fill it up. Starting with some sort of barrier material to keep the soil from falling out. I lined the planter with wire and then put down landscaping fabric (this lets water out but keeps everything else in). On top of that, and up the sides, I put straw in as another barrier.
And then you’ll need the compost/soil/plants/seeds/etc.
You can layer these between the side slots and then have your top piece with strawberries (see image below).
And in no time your strawberries should be big and bushy and doing beautifully!
Garden Shelf Pallet Project
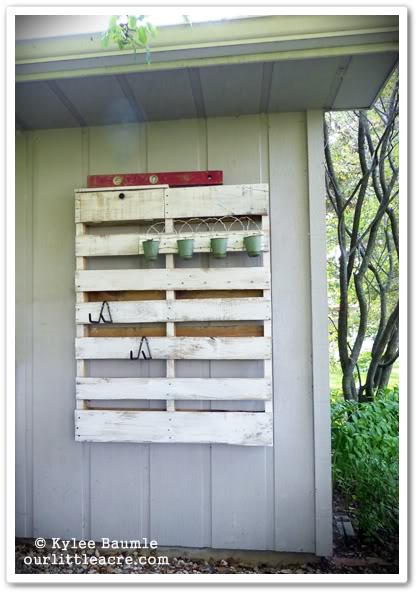
I made this project with my brother. We put it up at his home since it was something he had been wanting to do. It’s really handy and makes it so essential tools are easily accessible and don’t need to be tracked down in the shed by the pasture.
Part One: Compartmentalizing
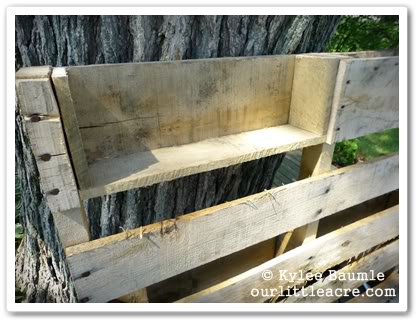
We added a compartment to this activity to store little sprinkler heads or whatever odds and ends that might be needed.
You start by cutting out the front top pallet board to make a door.
Then, from a different pallet, you cut out measured pieces to create a top and bottom for the compartment. You attach the hinges and a magnetic device to keep the door closed (you can also you a latch system). Attach whatever knob you see fit to the front of it.
 Part Two: Prime and dry brush
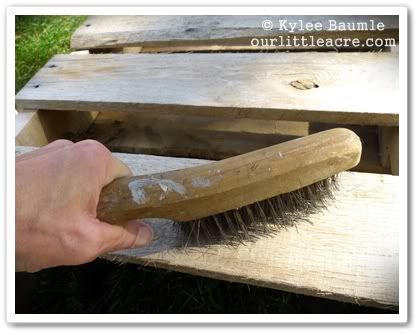
Next you’ll want to prime the pallet and dry brush it to give it a weathered look. Or you can simply paint it as well. This is all up to your creative liberty.
Part Three: Putting it up
We hung it up on a wall on the side of his garage. We put some hand hoes, spades, and potted plants to hang from its planks.
It looks good and makes life easier for him and his wife while they’re out in the yard.
Chicken Wire Planter Project
This is a great project for your yard. You can hang it on a fence or a back porch. The hanging plants looks very pretty.
You starting team:
- Pallet boards
- 2 ft. chicken wire roll
- Staple gun
- Thin wire for hanging
- Clay planters (or something to weigh wire down while cutting out pieces)
- Wire cutters
- Container planting soil
- Moss sheets and moss
- Material that is like a screen or burlap or plastic liner
- Scissors
- Trailing annuals are a good plant for these. Or any plant you’re wanting to hang up.
Part One: Sanding and wiring
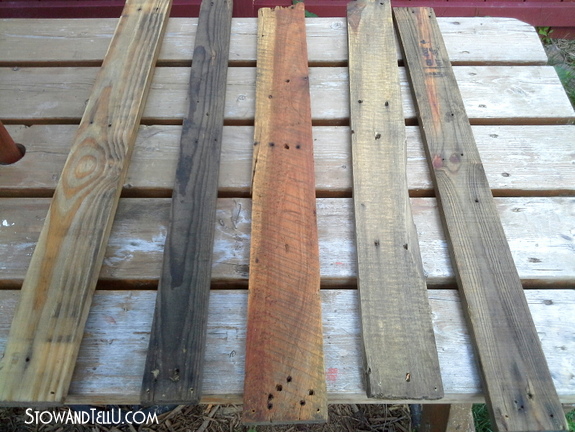
Sand your pallet pieces down and then stain the wood. Alternatively, you can mix canola oil and vinegar together to bring out the color of the wood without staining them.
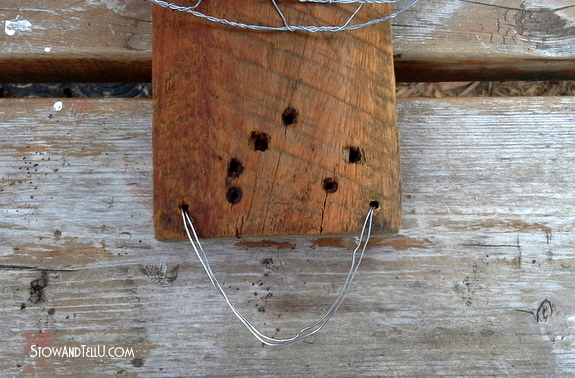
The drill two holes at the top of your pallet piece and run some wire through it to hang it up later.
Part Two: Cut the wire
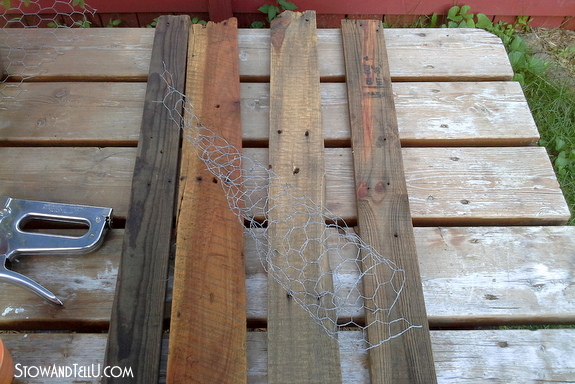
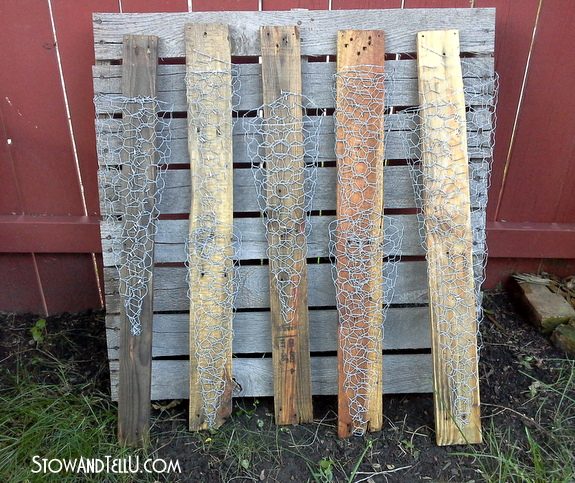
Weigh down your chicken wire with the planters or something that works while you cut it. Cut them out into a triangular shape about 2/3 the length of the chicken wire roll.
Roll the triangle pieces into cones. You can snip off the excess chicken wire one you have it attached to the boards.
Part Three: Staple it down
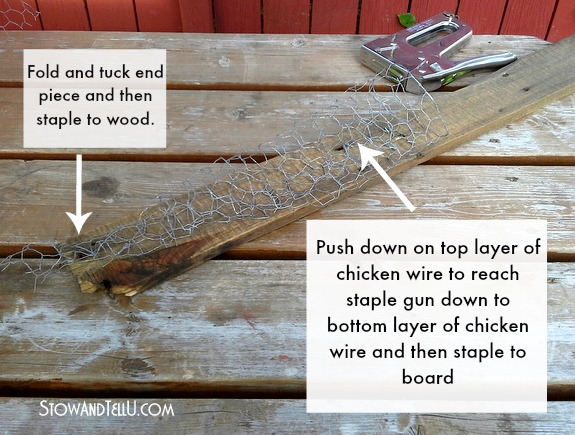
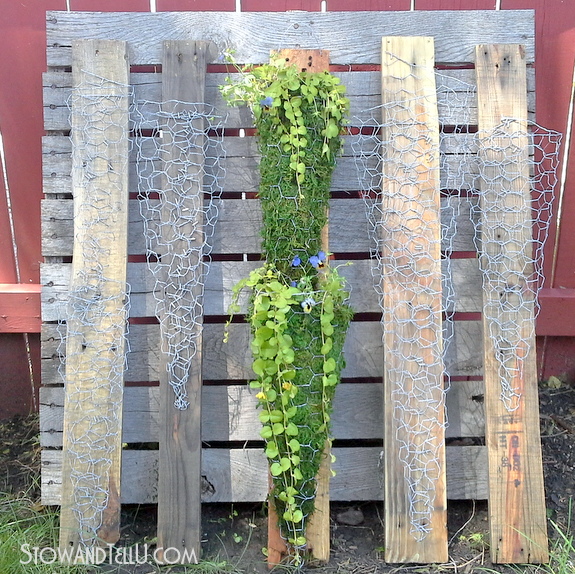
Set the cone down on the pallet and staple it on the top and bottom. Be sure to fold and tuck your end piece and then staple it to the wood. Give it a tug to make sure it is secure.
You can do a couple smaller ones on a pallet or one big one. It’s fun to vary the sizes and create different cascades or patterns with them.
Part Four: Filling it up
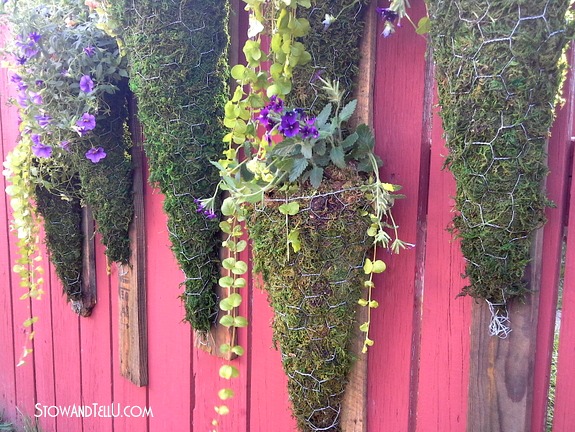
Cut your sheet moss in half diagonally. Make the moss into a cone that can fit inside the chicken wire with the seam side down.
Cut whatever screen material or plastic that you have into a trapezoid shape (note: plastic keeps moisture in longer). Then put this into your cone seam side up. Cut off unevenness so that all of it stacks evenly after you’ve moved them down all the way.
Fill the pot with your soil and plant your flowers. You can also top off the plant with moss pieces as well if you’d like. It is recommended to protect the flowers and keep things moist.
And there you go! Beautiful hanging planters. I really enjoy these in my yard and my siblings have also loved them.
Dog Bed Pallet Project
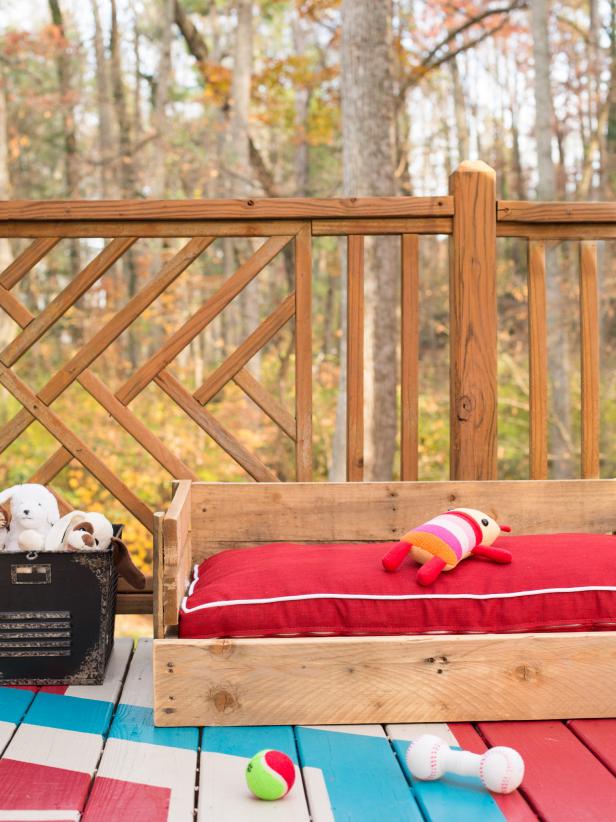
My sister has a couple puppies that love to curl up and sleep together on the couch and bed. They’re trying to wean them off the furniture and were looking for a dog bed that would look good in the house too.
I just knew there had to be a pallet project hidden in this somewhere.
And sure enough, I found this cute one to do with her.
Your starting team:
- Pallets
- Measuring tape
- Hammer
- Drill
- 1 ½ in. finish screws
- Stainless steel finish nails
- Chop saw
- Carpenter’s pencil
- Large doggie mattress that is going to fit your dimensions (remember to make it outdoor or weather-proof if you’re making it for outside
Part One: Dismantle and dimensions
Dismantle your pallets and pick out your best pieces. Pick your dimensions for your bed. (Note: 12-16 inches is recommended for small/medium dogs and 14-18 in. is recommended for bigger dogs).
We started making ours too small and had to start all over. Thankfully we realized it before we got too far. We went with bigger dimensions since her dogs like to curl up together. Just remember to keep this in mind so you don’t have to start over.
Part Two: Measuring and cutting
Measure your side boards and mark them for cutting at 24 in. lengths with a circular saw. On the rear and bottom boards you will want to mark and cut at 36 in. length with a circular saw. These boards are going to be the back and bottom.
Next you’ll want to cut structural pieces. You’ll want to measure and mark 1 ½ strips then cut them with the circular saw.
Use that saw after to cut 6 pieces of wood the length you want the overall height.
You’ll also be cutting your front fascia board to the length of the front edge and attach it after you put the other pieces together.
Part Three: Attaching
Put out your rear panel boards on a flat surface and attach your structural pieces on each of your ends with the nails or screws. Lay out your side panel boards and do the same thing.
Then attach your side panels to your rear panels with nails or screws.
Now you’ll be attaching that front fascia board into the side panels.
Put planks on the base’s underbelly and make sure they are flush and level so the dog bed will sit straight.
Part Four: Sand and polish
Now you can sand off the rough edges and make everything all nice. We painted her bed with a non-toxic paint because we thought it would look better. A polish might be very nice too.
Her puppies love it and have taken to it rather well, though they still like to try to sneak on the couch. Hopefully soon she’ll be able to completely wean them over.
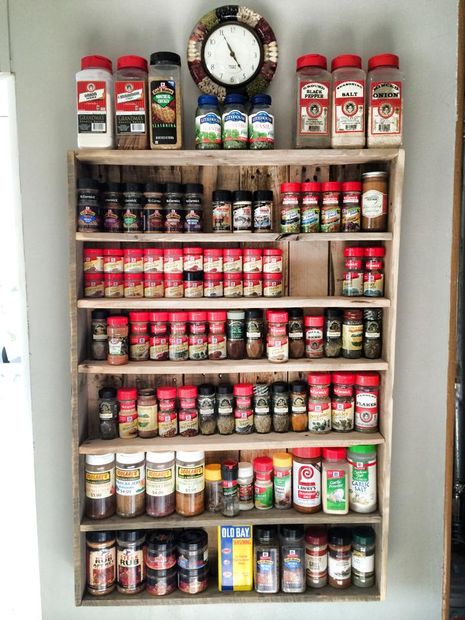
Spice Rack Pallet Project
Ok, so a spice rack has been on my diy list for a while now. I have so many spices and my little spice cupboard is not big enough for everything. Additionally, I hate searching around for 10 minutes for some hiding spice or another.
Despite this inconvenience, it still took me forever to get to this project. Isn’t it funny how we do that to ourselves sometimes. Anyways, I love this now, it’s super easy, and I wanted to share it with you all.
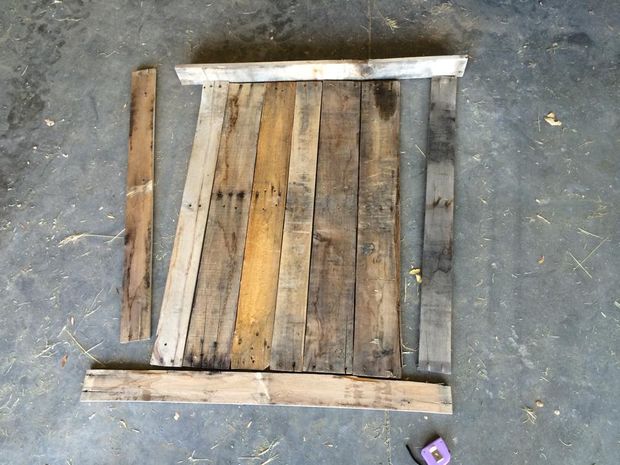
Part One: Dismantle and layout
Dismantle your boards and sand and clean everything you’re going to be using.
(Note: I forgot to stain and paint before I attached, so I just did it after the whole thing was complete. It ended up working out, but you may want to consider doing it before you put the whole thing together)
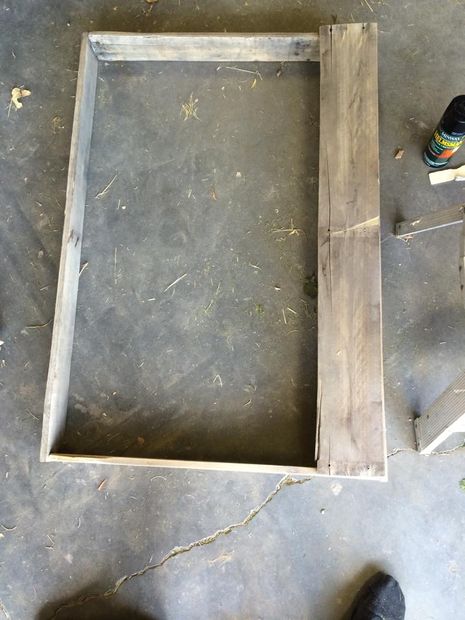
Part Two: Putting it together
Figure out the dimensions you want for your rack. I just used the length of the boards as they were already. Then I used wood glue and nails (after the wood glue dried) to attach them all together into the frame of the rack.
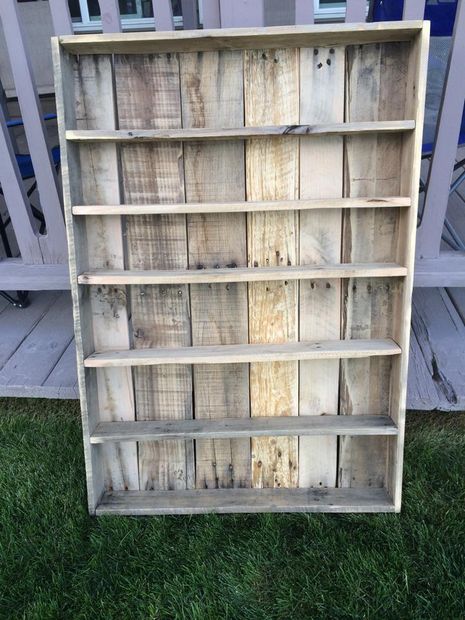
Then you lay out the back boards across the back and nail them into the frame kind of like laying train tracks (remember to use both wood glue and nails for more stability).
I measured and cut the shelves at this point. The shelves were different lengths because my spices are varying sizes, so I had to compensate for that.
After, I slid them in with wood glue and then nailed them in. Easy-peasy.
Part Three: Enjoy
I ended up staining the wood at this point with a dark stain. I think it looks beautiful because of the simplicity. And it is super easy to find all my spices now!
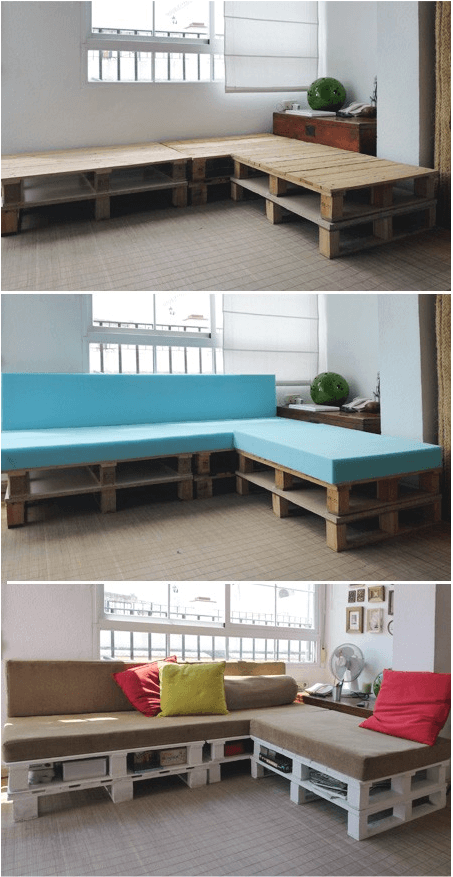
Pallet Sofa Project
I ended up doing it for our downstairs “hang out” room. Our kids like to spend time with friends, play games, and we do a bunch of family nights down there too. The pallet sofa matches the casual and fun energy of the room.
And besides, this is by far the easiest diy you’re going to do with wood pallets.
Your starting team:
- 6 wood pallets
- Electric sander (or something to sand with)
- Sandpaper
- Pain and paintbrushes
- Flat brackets and screws
- Drill
- Cushions and pillows for when you’re done
Part One: Sanding and painting
So this baby you jump right into sanding it down and making it nice.
Then paint it whatever color you’d like and let it dry for a while.
Part Two: Secure the pallets
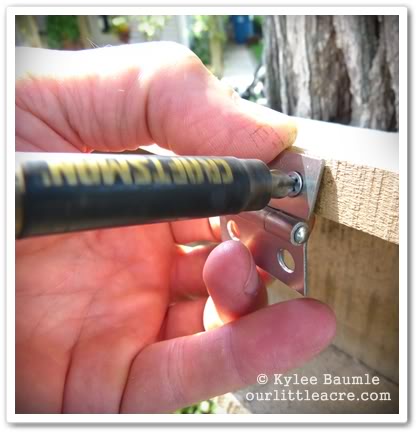
To secure the pallets you simply screw a flat bracket to the top and bottom of the pallet (on the back) on each end and then another on the top front and back of each of the pallet sections you’re going to put together.
Part Three: Lounge
Now you simply cover them with the cushions and pillows and there you go! Super simple lounge area.
You can store magazines and movies in the pallets and it’s super convenient. We love this!
Wine Rack Pallet Project
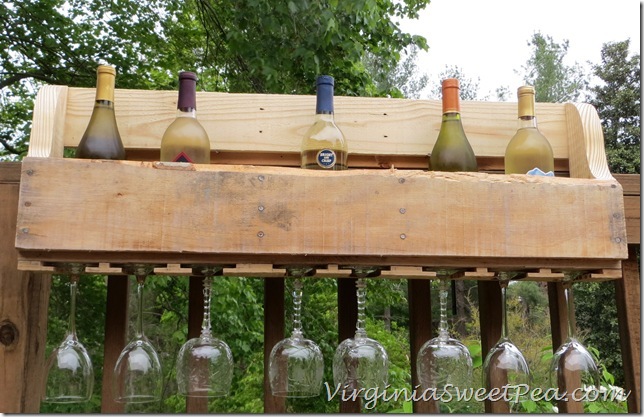
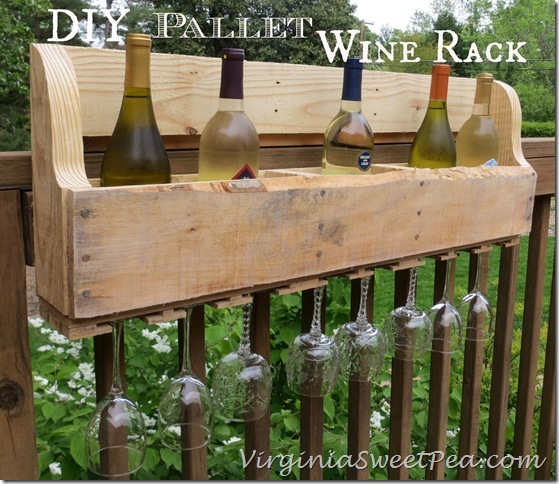
Personally, my husband and I don’t drink. But we have friends that do, so this project became a great birthday present for my friend. She had been saying she wanted a way to organize her wine and glasses in her new home. So, naturally, I wanted to do a cool project for her.
Part One: Cutting it up
Use your handsaw and cut off the bottom two parts of your wooden pallet and remove the top board to create a kind of container.
Cut through your middle board(s) and remove them.
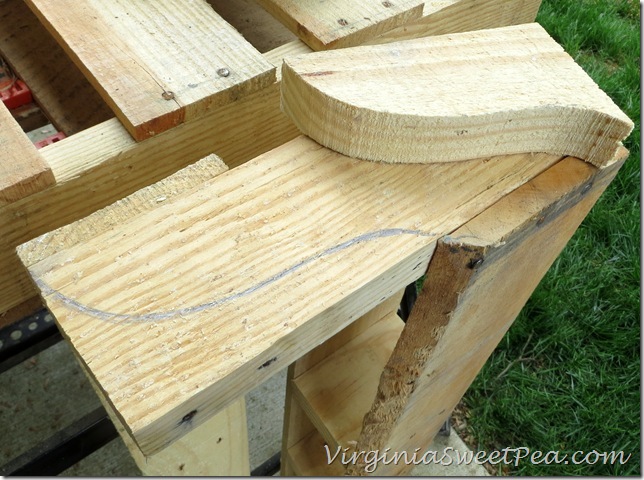
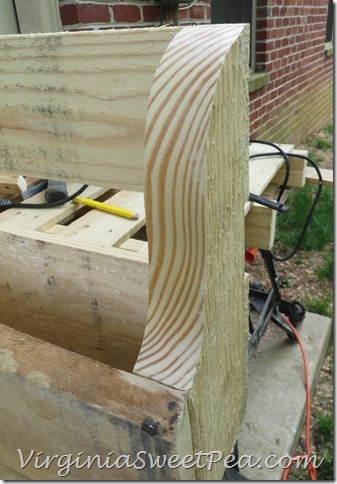
You can use your jigsaw to cut a different angled or pretty edge. Simply draw it on with a pencil and saw it off to create some grace in its lines.
Go ahead and sand your pieces, making them nice and finished.
Part Two: Putting it together
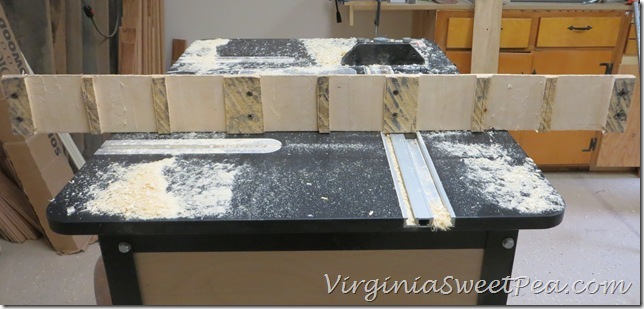
Take the top board you took off at the beginning and screw it to the bottom of the rack.
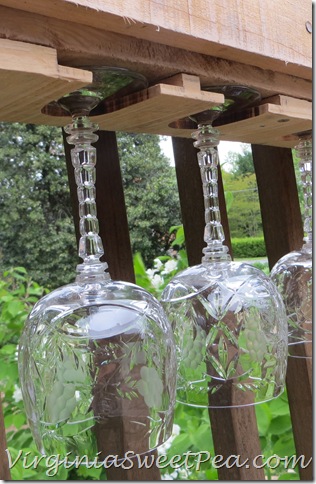
Take another board from the pallet to use to make glass holders. I made the slots 3 ¼ in. wide for each glass (make sure you give enough room for the glasses). These are going to allow the glasses to hang from their bottoms and they function like a slot to take them in and out. Pencil a U shape as you move inwards with your cut. This gives more support to the glasses hanging there.
So this does take a little measuring so that it’s not too big or too small.
Then attach this board to the bottom of your wine rack.
 I ended up doing a dark polish on this baby to suit it to my friend’s home.
Part Three: Enjoy
I love this wine rack so much, and my friend was so excited about it. It looks great in her kitchen and suits its purpose well.
I highly recommend.
Pallet Swing Project
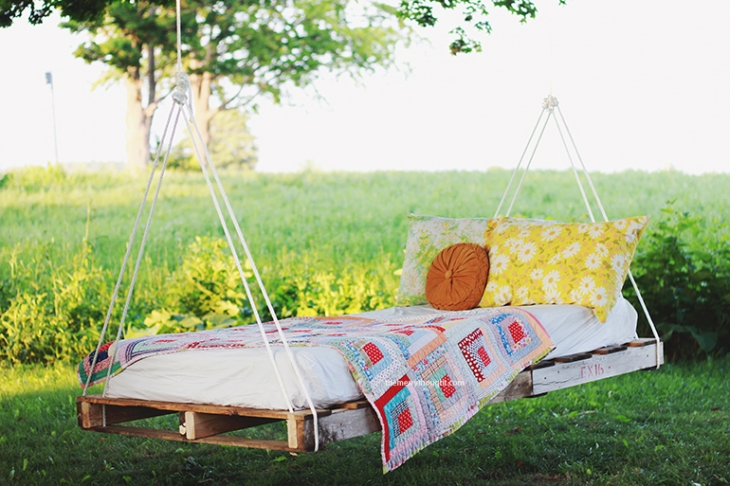
This project is a great addition to any yard. We put this pretty in last weekend. My teen daughter and I will lounge on it and read together. I love swinging with my little toddler. And my husband and I really love to cuddle on evenings out there. It’s pure bliss.
Though there are many ways to do pallet swings, this is the one we went with.
Starting team:
- Pallets
- 2×4 wood (I ended up using three 8 ft. pieces)
- Drill
- Screws
- Measuring tape
- Saw
- Rope (with correct poundage—700 lbs or more would be good)
- Mattress or cushions (I used a twin mattress)
- 2-3 vinyl zippered mattress covers
Part One: Measuring
Measure your mattress or cushions and note measurements needed to see how many pallets you will need for the project. I used two and added some pieces in the middle to get the right measurement for mine. (Note: remember to take into account the space you’ll need to be tying your rope to at the ends).
Part Two: Attaching
Through each inside edge of the pallet and in the middle, put the 2×4 pieces of wood and screw them into place.

Add any additional pieces you may need at this point (like we attached our center piece here).
Now trim any 2x4s that are sticking out past the pallet.
Drill holes in each of the corners of the pallet (both bottom and top boards) and make sure they are big enough for your rope to fit through.
Put the rope through the hole and make sure it goes under the pallet and around the 2×4 as you tie it tight.
Part Three: Hang it up and enjoy
Tie up your swing tight in your tree.
Protect your mattress with your vinyl covers and go ahead and deck out your swing. We loaded ours up with blankets, a light quilt and quite a few pillows.
Super cute and super fun.
Pallet Table Project
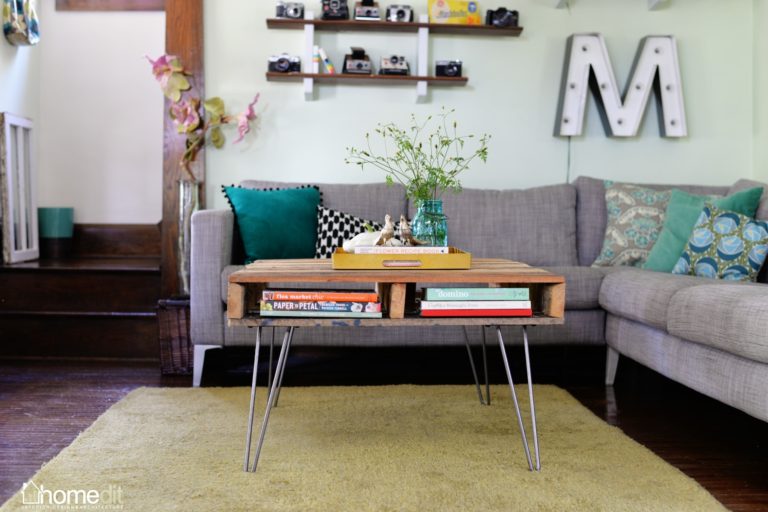
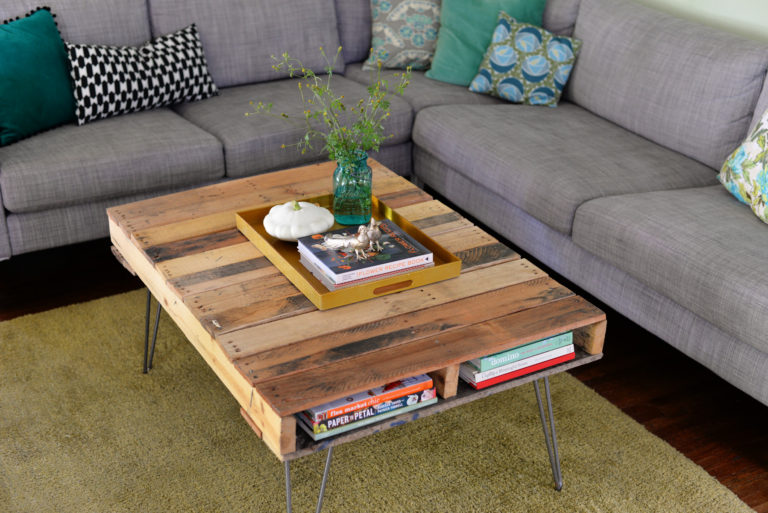
I love this hairpin leg coffee table. I ended up making a few of these (one for me and a couple for friends). They are super easy to make and fit comfortably in most rooms. Also, like the couch/lounge area project, they have room where you can fit magazines, books, DVDs, piano books or whatever into the pallet slots in the middle. It’s so convenient.
Your starting team:
- Pallet
- Drill
- Saw
- 12-14 in. hairpin legs
- Clear varnish
- Paint brush
- Paint (optional)
Part One: Cutting it down to size
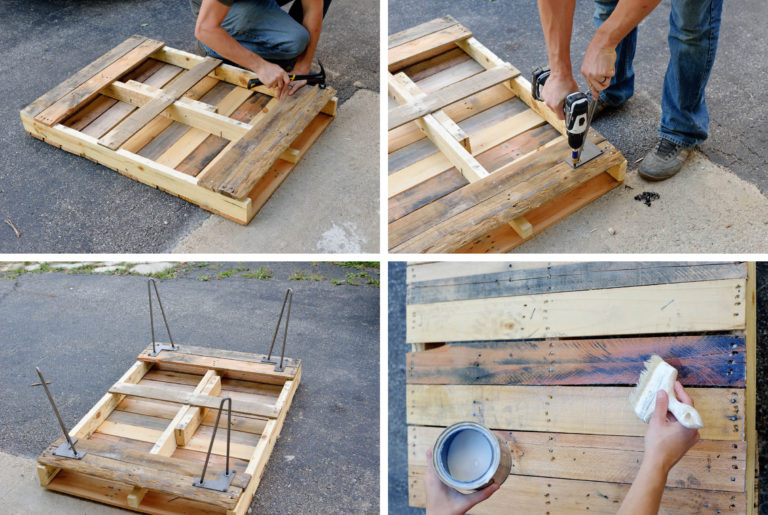
You can leave your pallet the size it is or cut it down to the size you need.
Depending on your pallet, you will probably have to fill in gaps in the wood by taking the planks off another board (or the piece you cut off) and nailing them into the gaps. As always, I recommend taking these other planks off with a nail cutter or something rather than prying them off since they break easily.
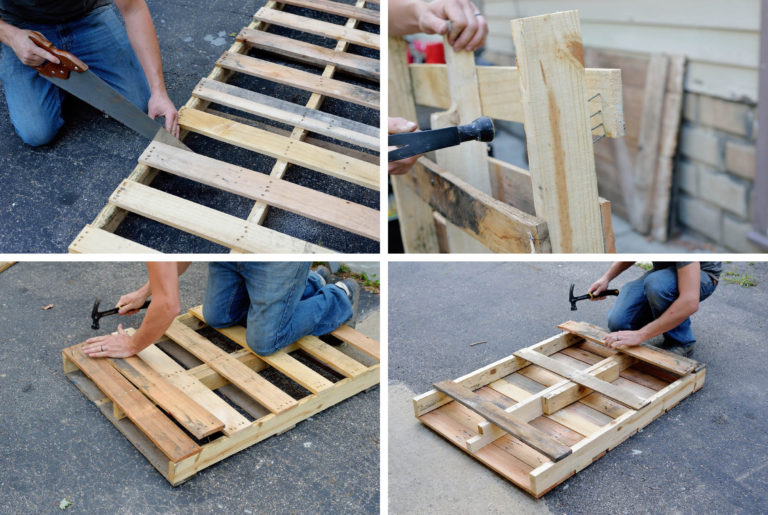 You can also sand things down to make them clean and smooth at this stage.
Part Two: Piecing it together
Put at least two planks on the underside to make sure there is room to attach the legs of the table. (Note: you may want to fill in more if you want your shelf space to go in deeper).
Then screw your legs into each bottom corner of the pallet (consider pre-drilling the holes before screwing the legs in).
Part Three: Making it pretty
If you haven’t already sanded them down, go ahead and do so now.
Apply a couple coats of varnish and let it dry for a couple hours before you bring the table inside.
You can also choose to paint yours to fit any room in the house. My son and I painted our table blue for our downstairs family room (the same one we put the lounge pallet couches in).
Glowing Pallet Bed Project
This started out as a project I was doing with my son who is ten. And then my toddler and teenager liked it so much we did it for their rooms too. It was a huge hit even my husband tried to get me to do our bed too (I just don’t think it’s a good fit for our home décor in there is the thing).
Your starting team:
- Pallets
- Sand paper and sander
- Paint and paint brushes
Part One: Getting the pallets ready
Measure your mattress and figure out how many pallets need to be fitted together. We extended the pallets past the edges of the mattress to use as a step and a shelf to put things on such as a phone or book.
Make sure your pallets don’t have any nails sticking out. Sand down the wood nice and even for an easy painting job.
Part Two: Painting
Now paint the pallets your desired color(s). We found a couple colors can look really neat when you can see them sticking out from under the bed.
Part Three: Putting it together
You can either attach the pallets with hinged or brackets, or you can just move them together and let gravity do the rest.
We won’t judge you for keeping it simple.
Next, the part that was the biggest hit, add lighting in the pallets. We found strand lights to be very successful under the beds and woven around the pallets. We also found LED light bulbs to be ok as long as there isn’t too much heat. But I would definitely go the strands of lights route. We thought it looked cool.


July 13, 2016 @ 6:36 pm
I don’t know if it’s just me or if everyone else encountering problems with your blog. It appears as though some of the text within your content are running off the screen. Can someone else please provide feedback and let me know if this is happening to them as well? This might be a issue with my internet browser because I’ve had this happen before. Thanks
July 13, 2016 @ 9:59 pm
Hello! Thank you so much for your comment. I opened my website in multiple different browsers, and I can’t seem to find a problem! Have you tried it on another machine?
July 25, 2016 @ 3:58 pm
Pretty! This has been an incredibly wonderful article.
Many thanks for providing this information.
August 11, 2016 @ 10:39 pm
Thank you so much for reading! Please come again!
August 4, 2016 @ 8:35 pm
Howdy! This post could not be written any better! Experiencing this
article reminds me of my previous roommate!
He always kept preaching about this. I am going to send this informative article to him.
Confident he’ll have a great read. Many thanks for sharing!
August 11, 2016 @ 10:38 pm
Hey thank you for reading! I’m so glad it has come in handy for you! I certainly hope it will find your roommate well. I hope to see you both back here for more projects! And if you have any of your own that you’d like published, I would be more than happy to take a look at them!
August 4, 2016 @ 9:04 pm
Hi there, You’ve done a great job. I certainly digg it
and will personally recommend it to my friends. I’m confident they will be benefited from this site.
August 11, 2016 @ 10:36 pm
Thank you so much! I would be flattered if you shared this with all your friends!
August 6, 2016 @ 5:25 am
I really appreciate this post. I’ve been looking all over for this! Thank goodness I found it on Bing. You’ve made my day! Thanks again
August 11, 2016 @ 10:38 pm
Oh that makes me so happy! I’m so glad it has been helpful for you! That is exactly why it’s on here:)
August 14, 2016 @ 1:46 am
I adore the things you guys are up too. These kinds of
clever work and coverage! Continue the awesome works guys I’ve added you guys
to blogroll.
August 15, 2016 @ 5:02 pm
Hey thank you so much! It’s great to hear my posts are being appreciated! Be sure to keep coming back for more posts!
August 17, 2016 @ 5:49 am
Hey! I could possibly have sworn I’ve gone to this
website before but after browsing through a number
of the posts I realized it’s new to me. Anyways, I’m definitely happy I stumbled upon it and I’ll be bookmarking and checking back often!
August 17, 2016 @ 3:40 pm
Hey back! I am so glad you found me, too! PLease keep checking back:) It’s always nice to hear such positive comments. Thank you!
August 17, 2016 @ 3:32 pm
We absolutely love your blog and find most of your post’s to be exactly what I’m looking for.
Do you offer guest writers to write content for you?
I wouldn’t mind producing a post or elaborating on some of the subjects you write related to here.
Again, awesome weblog!
August 17, 2016 @ 3:44 pm
Thank you so much! Guest posting is definitely something I have considered! I’d love to get in touch to collaborate about what we may be able to work out! What is a good way to contact you?
August 18, 2016 @ 1:41 am
Highly descriptive post, I liked that a whole lot.
Will there be a part 2?
August 18, 2016 @ 5:38 pm
Thank you! I’m glad you enjoyed it! Part 2 may be coming in the future!