Skin-Deep—Top Tips To Keep Your Skin Rockin’
TLDR: Learn how to make your own soap, skin masks, get rid of skin tags and so much more! Your helpful guide to natural glowing skin is all right here.
Table of Contents:
Inner Beauty
Homemade Soap
Coffee Scrub
Oatmeal Face Mask
Egg White Mask
Skin Pigment Removal
Skin Tag Removal
Vitamin Water Detox-Flat Tummy and Clear Skin
Inner Beauty
It might sound cliché, but inner-beauty makes you glow. Real character traits such as kindness, integrity, and honor speak much louder on your skin than any skin mask will.
I read this thought the other day that said something to this effect: Imagine if the words you spoke appeared on your skin, would you be more thoughtful of the words you used?
That made me think about how I speak and which words I used the most. I certainly found room for improvement. I love that thought because it reminds me that inner beauty and how we treat others makes us beautiful. Not just simply moisturizing well and using nice cleansing creams.
Homemade Soap
Homemade soap is free of harmful chemicals and is much better for our skin. I have loved developing this into a part-time hobby of mine. I have a ton of fun doing it with friends, making them as gifts, or even selling my extras.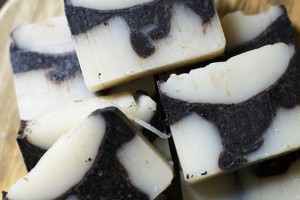
There are many ways to make soap and several different recipes out there. Feel free to look around for something simple to start out with.
Check here for some creative recipe inspiration!
A good, simple one to start with is this one from smallnotebook.org:
- 5 oz olive oil for moisturizing
- 1 oz shea butter for moisturizing
- 12 oz coconut oil for good lathering
- 9 oz palm oil for a firmer bar
- 8 oz lye (sodium hydroxide)
- 5 oz of water (distilled)
This is going to give you about 51 oz of soap (14 bars)
Different oils create different qualities in soap. And the fun is in experimenting!
What’s In The Oil
Oil Properties for Soap-Making (from Fimby)
- Stable, long-lasting, hard: palm, lard, tallow
- Lathering: castor, palm kernel, coconut
- Conditioning/Moisturizing: olive oil, sunflower, soybean, canola
- Extra-Moisturizing/Luxury: shea butter, hemp, jojoba, almond, cocoa butter
The Truth About Lye
Now some people get nervous about using lye. The thing is, as long as you’re safe, it’s all perfectly fine!
You have to use lye in order to make the soap. The alkali mixes with the fatty acids from the oils to saponify the oils. The saponified oils are what provide the cleaning agent.
I felt a little nervous at first too. But when I started I soon realized it really wasn’t a big deal. So long as you use the right amount of lye in your soap making there shouldn’t be any left in the soap when you’re done.
Use online lye calculators such as this one from thesage.com to find out the right dosage.
You can buy lye online. There is a list of online suppliers here.
Essential Oils, Textures, and Colors
This is my favorite part to shop for and create.
I love the smell goods!
You can search online for good combinations and then experiment with them to find out what you most love.
I really enjoy patchouli, lavender, and peppermint.
I would recommend researching it first if you’re not familiar with essential oils so that you don’t wind up with something very bitter smelling (unless you’re into that).
For textures and sometimes color, you can use oatmeal or calendula flowers or any type of additives. Honestly, I don’t like putting in textures. I don’t see the point of them. Oatmeal is supposed to be good for your skin. I guess I’m just not sure if it really helps if a few of them are scraped across your skin when you bathe.
I could be totally wrong though!
Tools and Molds
You’re going to need a thermometer, scale, and a hand blender along with your standard kitchen stuff such as stainless steel pots, measuring units, and so on.
I never mix my lye equipment with my cooking equipment. Technically, you could rinse glass or steel of it opposed to wood. I just opt for the super safe route probably because I’m paranoid.
Soap molds can be a lot of fun. I totally encourage it. But if you’re going for quick, cheap, and direct, then a simple cardboard box (like a shoe box) lined with plastic is a good way to go.
How to Get Your Soap On (usually takes about an hour):
- Get your tools and ingredients out and ready to use (don’t want to have to get into things with dirty hands). Line your mold with plastic or freezer paper.
- Put a pot on the digital scale and measure out your solid oils into it.
- After measuring them, warm them over low heat until they melt.
- Measure out the lye…my least favorite part, but it’s not too bad. Just be careful—remember it is poison. Any time I am handling the lye I wear glasses and long rubber gloves.
- Measure your water in your container and pour it into a heat-resistant bowl.
- Pour your lye into the bowl of water and stir. It will give off heat and fumes. I opened the window for the fumes but it wasn’t too bad. After a while the water will clear up. Make sure to use hot pads to handle this bowl now.
- Measure out your liquid oil into a separate bowl and, once the solid oils are melted down, add the liquid oils to that pot. At this point you could probably turn off the stove since the oils have probably reached the desired temperature of 110 degrees F.
- Put the lye solution into a sink of cold water to help it cool down. You also want this around 110 degrees F (doesn’t have to be exact).
- Once the lye and water mix is cooled, just pour it into the pot of oils and blend with your stirring device until smooth.
- Alternate stirring with this device and blending for about 5 minutes. It will start to look like pancake batter.
Caution: don’t raise blender up so that it would cause air bubbles. Or just use a deeper pot that isn’t as wide. - It will begin to have a certain look that is called “trace.” Basically it looks dull on the surface and it coats the blender thinly. At this point you would add your colors, essential oils, and texturizers.
- Pour the soap into the mold before it thickens too much.
- I use a wide and shallow mold because it is easier to handle.
- Put the mold in a cardboard box and fasten in lid on it. You can also cover the box with a towel to keep it warm if you’d like.
- Wash all your dishes/tools thoroughly.
- The soap will “gel” or get to a more gel state for about 30-40 minutes. Keep the mold in the box for insulation. After about an hour the soap will start to harden.
- Leave the soap in there overnight and it should be hard and ready to cut the next morning.
- Lift the soap out of the mold and peel away the plastic. Mark the soap where you plan on cutting it.
- Use a large kitchen knife to cut the soap. Some people use a potato peeler to smooth the edges.
- Line up the cut bars of soap in the box (upright so they can breathe) so they can dry out and age. The soap needs to age for four weeks before it is ready to be used.
- After 4 weeks, enjoy your soap!
Coffee Scrub
I love using this coffee scrub alternately with a couple other scrubs/washes I use for my skin. I feel like this one leaves my face glowing and healthy looking, so I love doing it before big events or girl’s nights.
The best thing about the washes/scrubs I use is that they’re all cheap, easy to make, and they work just as well if not a ton better than any expensive products I have used.
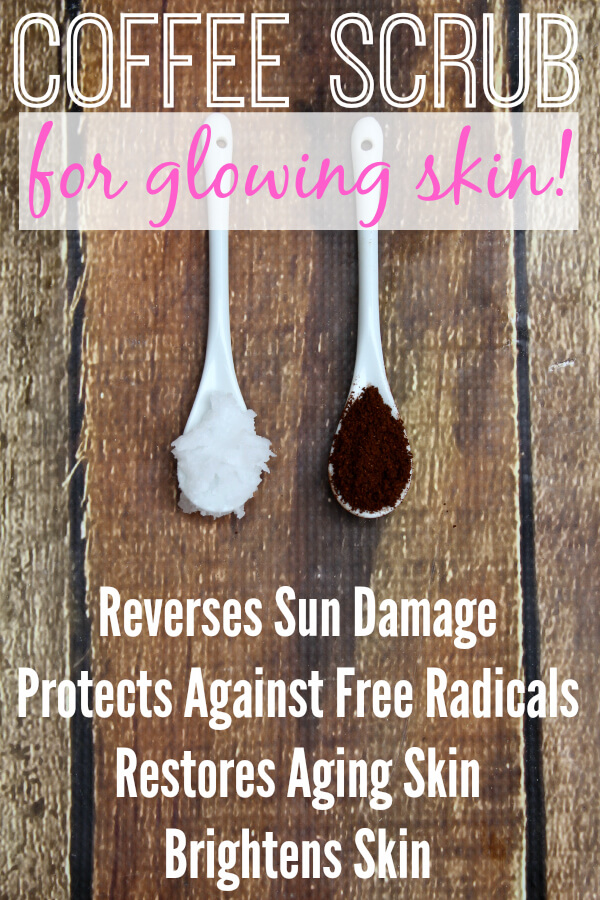
A long while ago, when I was looking for some excellent at-home and more natural skin care ideas, I read that this scrub reverses sun damage, helps to restore aging skin, brightens skin, minimizes lines, and protects against radicals.
Primally Inspired says that coffee is an antioxidant that protects our skin and the caffeine in coffee improves blood flow to the face which makes us look healthier and younger. I thought you had to drink it to get those benefits…but apparently wearing it makes a difference too. She also mentions that coffee, when applied to the skin, increases collagen and elastin production. It locks in moisture so the lines in our skin are less severe.
I’m not sure if the science behind this has been completely researched. But I do know that it has helped my skin look smoother, brighter, and healthier.
I go organic with my coffee beans since coffee beans tend to be heavily sprayed with chemicals. I also buy local organic to support my local economy.
Coconut oil, the other ingredient in this scrub, is amazing for all skin types. It is deeply nourishing, moisturizing, and it is also a strong antioxidant source.
I use cold pressed and unrefined coconut oil that is non GMO/organic. You can find it in any health foods store.
Ingredients (from Primally Inspired):
- ½ tsp coconut oil
- ½ tsp finely ground coffee beans
- Mix together and apply to face in circular motions like any face wash
- Leave on for about 15 minutes or longer (however long you like really)
- Rinse and enjoy
I usually use this scrub 2 times a week. Try it out and comment on what you like or don’t like!
Oatmeal Face Mask
I love my oatmeal face mask. I usually do it once a week with my daughter.
Oats can gently exfoliate your skin (and you might want to know it soothes sunburns too!) and their anti-inflammatory property is easy on sensitive skin.
Honey is antibacterial and it also has antioxidant properties. Honey is a great, natural way to cleanse your face.
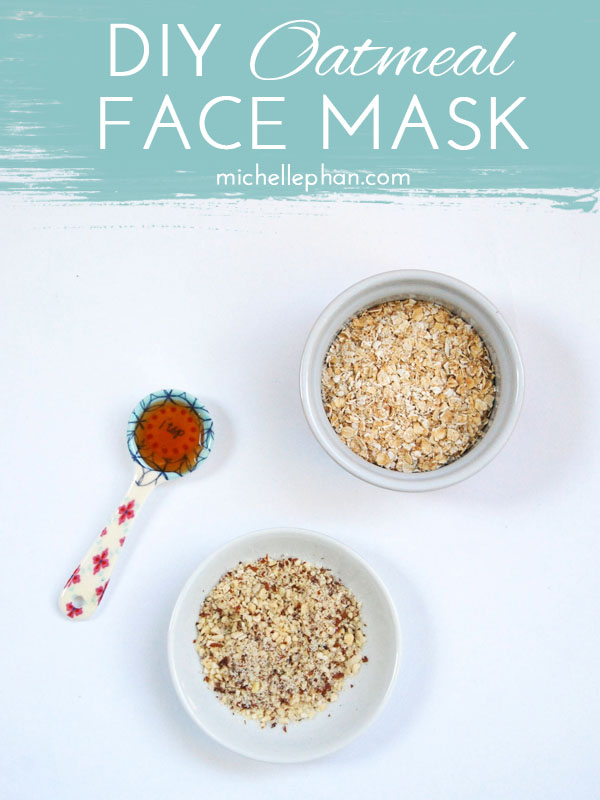
Ingredients (from michellephan.com):
- ½ dry oats
- Spoonful of chopped or ground almonds (optional: for exfoliation)
- 1 tsp honey
- Enough water or milk to make a paste (you can always add more if it’s too thick so start small)
- Leave on face for 10 minutes or however long you would like
- Rinse and enjoy
Egg White Mask
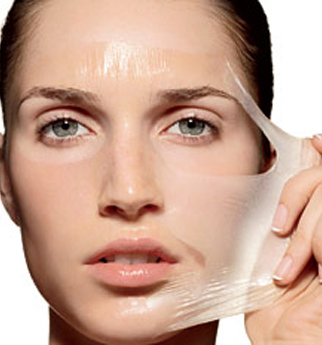
This is a great mask if I feel like I just want to peel off dead skin, refresh my face, lessen wrinkles, and it leaves my skin very firm.
I should also note that this mask is especially great if you have oily skin.
Mine is usually too dry, but I still love using this mask now and then. Let me know your skin type and how you like this mask for your skin types in the comments below!
Egg whites help tighten the skin and reduce the appearance of large pores. And this is a very simple mask to do as well!
Ingredients (from 7beautytips.com):
- 1 egg white
- Few drops of lemon juice
- Whisk together
- Rinse face with warm water first to open your pores
- Apply the mask to your face in upward circular motions
- Let it set for 15 minutes or however long you desire (you will fill it tighten as the egg creates a thin layer)
- Rinse off with warm water and enjoy
Skin Pigment Removal
Many people get darker spots on their neck, knees, elbows, and underarms. This is known as acanthosis nigricans and it’s caused by maturation, exposure to the sun, and dryness.
If skin isn’t taken care of these spots tend to show up. Skin on your elbows and knees do not naturally produce their own oil, so they are in need of getting moisturized often. Using antiperspirants or chemicals on your underarms can also cause these spots.
Dry elbows tend to run in my family, and we run into this “dirty elbow” look because of these spots.
Whatever your problem spot is, I’ve got some good ways to help you remove the unwanted pigmentations.
Neck
- Aloe Vera: lightens and saturates the skin. Helps to repair and create new skin cells. Simply apply it to the neck and leave it for 20 minutes. Wash off with water and repeat once every day for quicker results.
- Baking Soda: works well as a skin exfoliate and helps to remove hyper-pigmentation patches. Stir three-parts baking soda and one-part water to create a thick paste. Apply the paste to your neck and let dry. Rinse it off after a few minutes. Repeat 2 times a week.
- Potatoes: the chemical catecholase found in potatoes help lighten skin. Grind up the potatoes and put it over the patch. Leave it for 15 minutes and then wash with icy water. Do every day for best results.
Elbows and Knees
- Lemon: rich in vitamin which helps remove dead cells and help skin tone. It can also help the development of healthy skin cells. Rub lemon juice on your problem patches for a couple minutes and leave it on for about 20 minutes. Rinse it with warm water and apply a good moisturizer such as coconut oil. Also try this with 1 tbsp honey because honey is also good for your skin. You can get these at most grocery stores.
- Sugar: good for exfoliating. Mix equal parts of sugar and olive oil, making a thick paste. Apply it to your problem areas and rub in circles for about 5 minutes. Wash off in warm water. Do this once a day until you see results then do it once a week.
- Almonds: Use almond oil on your dark spots. Work it into the problem area for 5 min/day before bedtime. You should see results in a couple days. You can also use finely ground almonds to create a paste with yogurt. Rub the paste on your dark spots, let dry, rub around with wet fingers, and wash it off with cold water. You should see results if you do this 1-2 times a day for a couple weeks.
Underarms
- Cucumbers: Mix lime/lemon juice with cucumber juice and some turmeric juice. Lemon lightens the dark spot, cleaning out dead skin cells. Cucumber cools and turmeric releases staining. Do this every day until desired results.
You can also rub slices of cucumber under your arms along with the juice for desired results. - Milk: Use 2 tbsp milk, 1 tbsp curd, 1 tbsp flour. Blend them all together to get a paste, apply it under your arms, let dry and stay for 15 minutes then wash it off with water.
Skin Tag Removal
My aunt still gets a lot of skin tags. I remember asking her when I was little (and didn’t know better!) why she didn’t just pick them off. She laughed and told me because they were from angel kisses.
I think it’s awesome.
Maybe you’re totally fine with skin tags. If so, then great! Rock them like my aunt did!
But maybe you don’t feel so happy about them.
If that’s the case, I found out a couple good ways to remove them.
(Update: I asked my aunt if she thought this would seem accurate and good if she wanted to remove them. She said definitely would give these if that was the case. She also has friends who have had success with some of the processes we cover here).
Removal (from tiphero.com):
- Doctor/Dermatologist: This is the highest recommended way to remove skin tags. It is a very quick and painless procedure and the safest way to remove them. The major thing to take into account here is insurance. If you have many that need to be removed, it may be considered cosmetic and not covered by insurance. If you have one or two, the doctor may remove it as part of a regular physical which could be covered by insurance.
- Duct Tape: Put a tape over the skin tag and wait for the tape to start to come off. Check to see if the tag is looser. Repeat this process until the tag falls off with the tape.
- Apple Cider Vinegar: Apply the vinegar on the tag via a cotton ball 3 times a day for up to 2-3 weeks until the tag falls off.
- Band-Aids and Vit. E: Apply Vitamin E from a capsule to the skin tag and then put a band-aid over it. Leave on for several days and then check to see the tag has fallen off. Repeat the process until it does.
- Tea Tree Oil: Much like the apple cider vinegar, you apply 1-3 drops of oil via cottonball 3 times a day to the tag until it darkens and falls off.
- Alcohol and Nail Clippers: Sterilize the clippers and around the skin tag. There are no nerves in skin tags so it should be relatively painless to clip them off with the clippers.
- Dental Floss/String: Wrap the floss/string around the base of the tag just enough to block the circulation through it for a while. Do this every day until the tag dries up and falls off.
There you have it. Quick, painless ways to get rid of skin tags and create smooth skin.

Vitamin Water Detox—Flat Tummy and Clear Skin
Some of you already know I’m a huge fan of smoothies, juicing, and other yummy drinks for health.
I also love them because they are an easy way to get the kids and family on board with healthy habits!
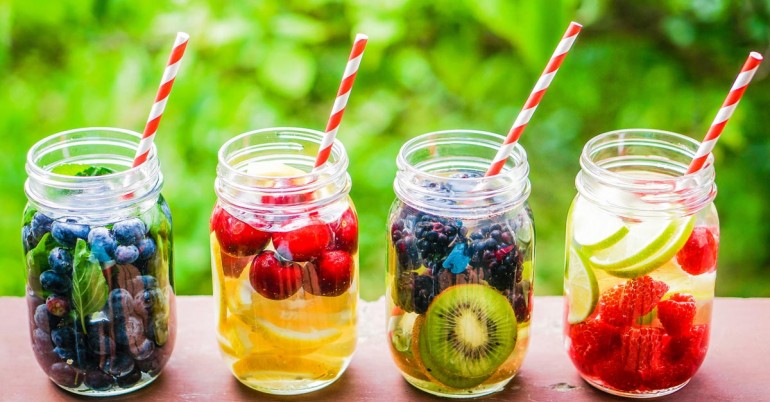
The following are some ways to liven up your water that also give you some vitamins. It can help you drink more water (some people don’t like the taste of plain water), and it can help you defeat the afternoon munchies with pretty much zero calories.
Drinking morewater will also help get rid of your bloat. The vitamins and plenty of fluids will clear up your skin and keep it young and glowing.
Yummy Water Detox (from curejoy.com):
Detox Lemon Water
As many of you know, lemon water is a personal favorite of mine!
Ingredients:
- ¼ – ½ lemon
- 1 glass of warm water
- Squeeze the lemon into the water and drink
- Best drank in the morning for a zesty start to your day!
Detox Cucumber-Lime Water
Many people love this one (especially if you love more of the green taste and the lime gives it some zest).
Ingredients:
- 2 liters of water
- 1 clean and thinly sliced cucumber
- 1 clean and thinly sliced lemon
- 10-15 mint leaves
- Ice
- You can reuse the ingredients up to three times
Detox Grapefruit-Strawberry Water
I love, love, love berries and this water is awesome tasting.
Ingredients:
- 2 liters of water
- 3-5 clean strawberries thinly sliced
- 1 medium clean, thinly sliced cucumber
- 1 small clean, thinly sliced grapefruit
Detox Ayurvevdic Tea
This one is a bit more interesting, but I enjoy it!
Ingredients:
- 1/2 tsp cumin seeds
- ½ tsp coriander seeds
- ½ tsp fennel seeds
- 5 glasses of water
- 1 container
- Heat up the water in the morning and mix the cumin, coriander, and fennel seeds to the bubbling water for 5 minutes. Strain the tea and put it into a container. Consume the tea throughout the day. This drink is a hot one, not cold. So heat it back up when you want some more.
Merry drinking! Let me know how they go for you or what you use in the comments below!
