Don’t Do Traditional? —Fun Bouquet Ideas That Make Weddings Pop!!!
alternative, bouquets, bridesmaids, DIY, ideas, wedding
0 Comment
TLDR: Not a fan of the traditional wedding bouquet for bridesmaids and brides? Check out these awesome, original, and atypical twists on wedding flowers and my “how-tos” on how to make them when you’re trying to save money or just put your own personal twist on them.
Table Of Contents
Camera Bouquet 
Comic Bouquet (Paper Bouquets)
Book Bouquet
Brooch Bouquet
Feather Bouquet
Parasols
Flower Crowns
Fans
Lanterns
Cow Bells
Good evening, Smart Moms!
I don’t know about you, but I get tired of the same-old, same-old at weddings.
Not that I’m against traditional!
No, no, to the contrary I really appreciate the role tradition has played in my life as far as giving me a sense of who I am, what I stand for, where my family comes from, and passing down honorary traditions that my family has done for generations.
I totally respect that.
But there are just some things that we’ve seen over and over that really have nothing to do with important traditions!
While I haven’t had any kids married yet, I still enjoy projects and weddings (both are so happy). Many of my friends enlist my help when a wedding is coming up because I’m such a project woman, and I really love to get my craft on!
Now if flowers are what you want in your wedding bouquets then go for it!
They’re still stunning.
But if you’re looking to do something a little new and different then please keep reading. I’ve compiled some pretty neat ideas for you!
Camera Bouquet
– Inspired by Rock and Roll Bride
This is a great bouquet for the photographer, the geek, or the original.

https://www.rocknrollbride.com/2013/01/geeky-gamer-pixel-themed-wedding-hannah-iwan/
Have your bridesmaids holding decorated cameras on small mounts in a bouquet-type fashion.
Tip: The vintage camera look is cute, but they aren’t always functional. If you want the bridesmaids to be able to take their own pictures, then you’ll want to make sure the cameras work well!
Creation:
- Get similar cameras or have each of the girls bring their own if you’re ok with them having different types (you don’t have to go super expensive with this).
- Implementing your wedding colors on the camera is important and adds a finished look. You can tie a big bow around the mount, stick bowed tissue paper on the camera’s surface, decorate it with cute stickers, put ribbons or streamers coming off the side, really anything you can think of to “cute” the cameras up.
- The bridesmaids will be free to take whatever picture opportunities come up. Seeing the unique eye of each of the bride’s friends is really cute and fun.
Comic Bouquet
-Inspired by Etsy
My brother and I really loved comics as kids, and if comics played an important role in the life of bride or groom, then these comic paper flowers are adorable.
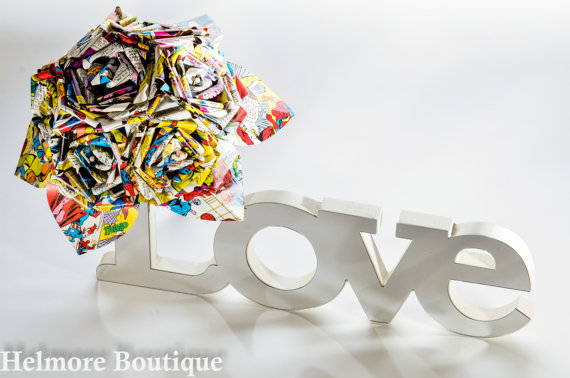
https://www.etsy.com/search?q=comic%20book%20bouquet&source=aw&awc=6220_1469828223_881715c433b58b66b867f976d3834d43&utm_source=affiliate_window&utm_medium=affiliate&utm_campaign=us_location_buyer&utm_content=181013
I have never made paper flowers before, so I looked them up on Pinterest and Etsy.
Etsy has super cute comic paper flowers here that you can buy at a reasonable price.
For those of you that want to save some money or just like to do things yourself here are a couple flowers that I tried out. I picked these two because they looked manageable and they have two distinct looks for brides who are maybe going for different vibes. They’re actually decently easy to do!
Spider Mum Creation
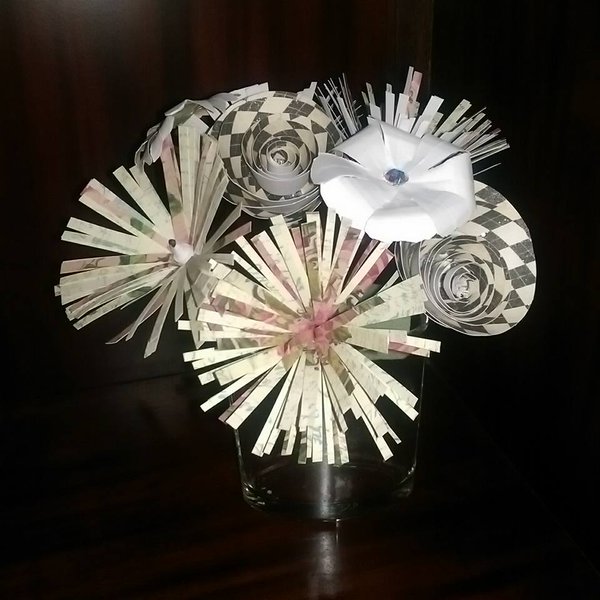
http://livelaughrowe.com/diy-paper-spider-mums/
- Supplies: 12×12 card stock or regular paper (can also glue the cardstock to the back of the desired paper if you want more of that form), fringe or regular scissors, tape, wire stems, green floral tape, glue (hot glue gun is preferred).
- Cut your 12×12 paper into strips (appx. 2-3 in. wide) and then create a fringe in them with fringe scissors or larger pair of normal scissors.
- After you cut the fringe, roll your paper up to form the bud of the flower then tape it closed.
- Hot glue your wire stem into the bottom center of your bud.
- Use tissue paper to fill the gap in between your bud and stem. Use your floral green tape to further secure the stem and the bud.
- Gently pull out the strips/petals of your bud to create the bloom.
Paper Rose Creation
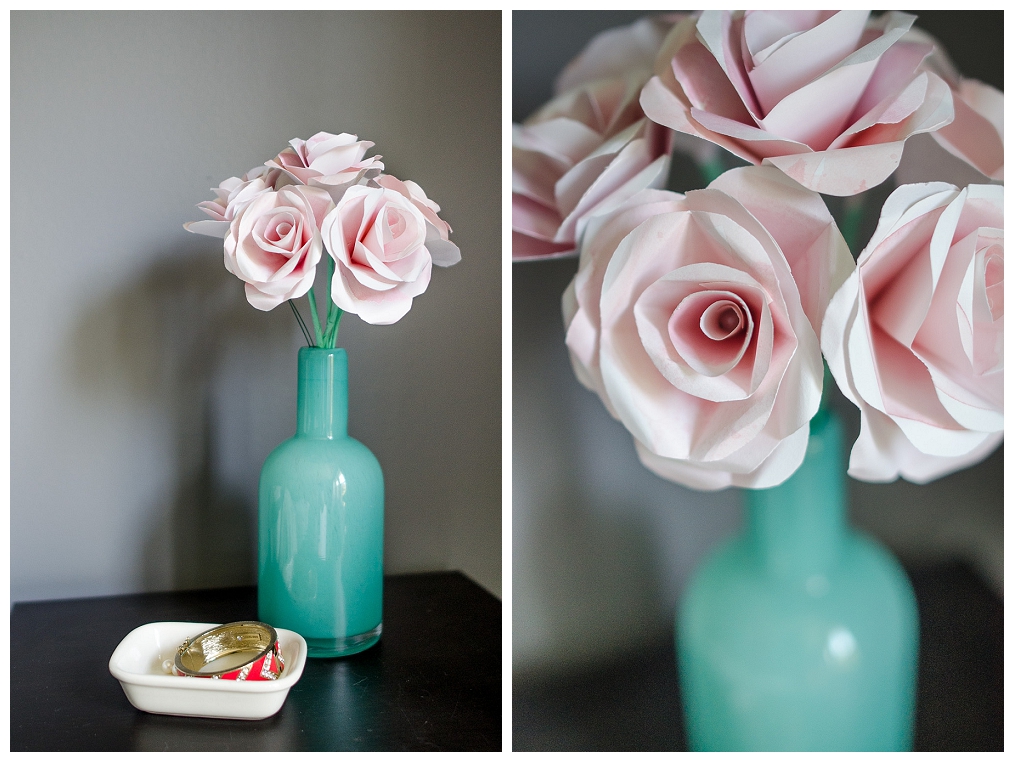
http://www.capitolromance.com/2014/04/30/diy-tutorial-how-to-make-a-water-color-paper-rose/
- Supplies: Paper (regular printer paper is good with this flower in order to make it more flexible—stiffer paper may make this one harder to shape), glue (I use hot glue), scissors, wire stem, bead 1/8 in diameter.
- Begin with three paper squares that are about 4 inches across. Fold it corner to corner (paper design on the inside) in half again and again until it makes a triangle with folds along the two edges of the triangle and open at the top.
- Cut the open part at the top into a rounded petal-like shape and cut a tiny amount off the bottom so that you’ll have a hole at the center when you unfold it. Again, you want this pretty small (about ¼ in. across) since you don’t want it too big for the wire and a smaller hole is easier to stack with.
- Unfold your triangle. Cut one petal along the fold lines out of your first square, then two petals out of your second square, and finally three out of your third square, saving all the pieces as they will form the rest of your flower later.
- Get some glue on the bottom of the first layer and then glue the two-petal cone onto the wire and allow it to dry as you hold it. Do the same with the other 3-6 layers. Space them out and rotate them so that you have natural looking gaps and levels and glue them all well.
- For extra security, slide the bead on half of the wire, at the bottom of the flower
- and at the top, and then wrap the rest of the wire around to secure it. You can also secure it with green floral tape. Thicken the stem by wrapping green tape or even a ribbon around it.
- Once you get the hang of it you can easily get about 5-7 done in a half hour. So pretty do-able!
Note: There are so many different ways to make paper flowers I may have to do a blog post all its own. There are great ideas I want to try! Keep in mind you can do these flowers with any type of paper…sheet music, origami paper, themed scrap booking paper, etc. These paper flowers could fit with just about any wedding with any additional personal touch.
Book Bouquet
-Inspired by Chic Vintage Brides
Book bouquets are easy and pretty. Perfect for the bookworm couple!
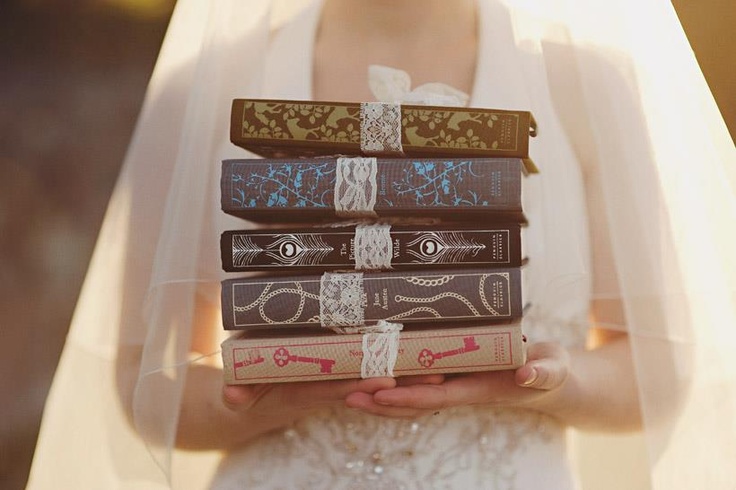
http://chicvintagebrides.com/index.php/flowers/10-alternative-bridesmaid-bouquets/
And very budget friendly!
Simply buy beautifully bound books with elegant covers and tie a nice silk, velvet, or lace ribbon around them. The bridesmaids will love the useable gift.
The books are a very nice touch with certain aesthetics such as a vintage theme.
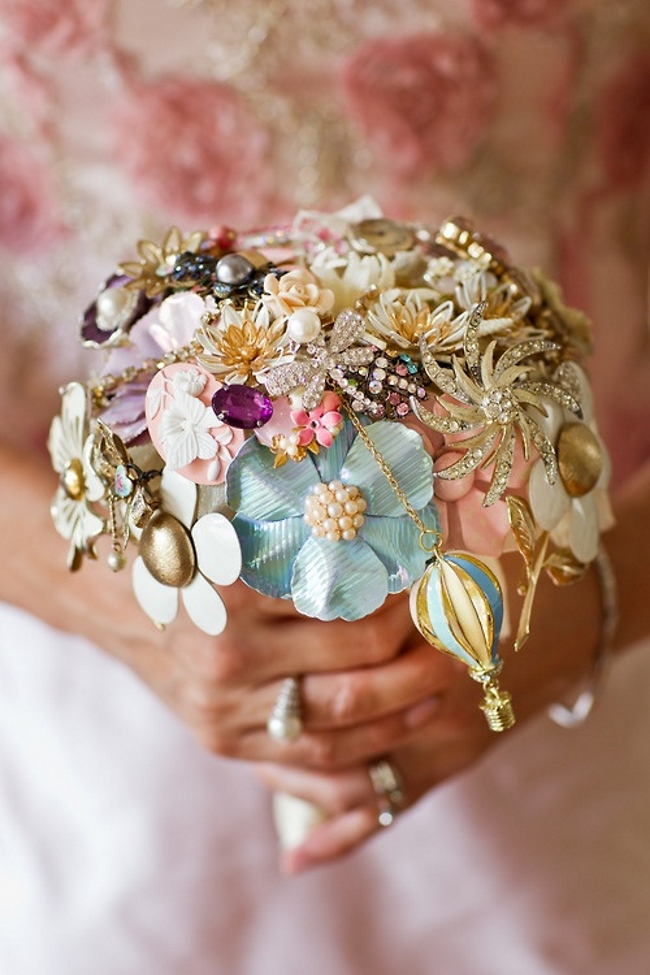
Brooch Bouquet
-Inspired by Chic Vintage Brides
Brooch Bouquets are a great alternative to fresh flowers. While they look floral in bouquet fashion, they stay together and last a lifetime and more.
http://chicvintagebrides.com/index.php/flowers/10-alternative-bridesmaid-bouquets/
What’s more, they are often filled with family jewelry and memorabilia…just packed full of memories and family legacy.
I love brooch bouquets!
Once again Etsy has been a great source for some beautiful brooch bouquets and is my recommendation for buying brooch bouquets.
If you desire to make your own brooch bouquet…and yes, of course I had to try it…then check out this “how-to” tutorial!
Brooch Bouquet Creation
- Supplies: Different sizes of pliers, hot glue gun, rubber bands, florist stub wires, florist stem tape, florist foam filled bouquet holder, ribbons, jewelry (brooches, earrings, rings, watches, up to about 50-60 pieces). The jewelry is my favorite part since that’s where it can be very personal. From your grandmother’s earrings to the grooms father’s watch, there can be a lot of personality and memories with these bouquets.
- Wrap a wire around each jewelry piece to get a stem like a flower. Make it tight and not rickety. Cover the stems with tape if you would like to keep them slip-safe when you move them around later.
- After you finish the jewelry pieces you’re going to want to get the foam filled bouquet holder ready. Steady your bouquet holder so that your hands can move freely. To round out and fill the look of the bouquet simply use wire and wide ribbon to create loops throughout the bouquet holder.
- Take each of the brooch flowers you’ve created and arrange them according to your desire. The bottom of the brooches should touch the loop ribbons lightly—don’t flatten the ribbons. You will have to remove some of the wire because they will be too long. The foam filled bouquet holder tends to crumble and widen the more you take the wires in and out so try to be deliberate about where you put them in.
- Now that your bouquet is really coming together, the finishing touch should be the plastic-like bouquet holder. Obviously it’s not very elegant just keeping it like that. There are a few different cute and personal things you can do. You could wrap the bouquet holder in silk or velvet, using hot glue to lock certain pieces in place. Adding in some beading or jewels can make it look quite pretty. Depending on the theme or vibes of your wedding you could plaster old family photographs and make a collage over the holder of family memories. You could have the family write the bride and groom nice messages on paper, which you can then make vintage looking and plaster it over the bouquet holder.
- Whatever personal style you incorporate with the brooch bouquet it is sure to be a personal and lovely addition to any wedding.
Feather Bouquet
-Inspired by Weddingomania
Feather bouquets can look very sophisticated and different for the bride wanting to stand out but in a subdued, elegant way.
As always, there are many different ways you can accomplish this look. I’m going to show you a couple of my favorites.
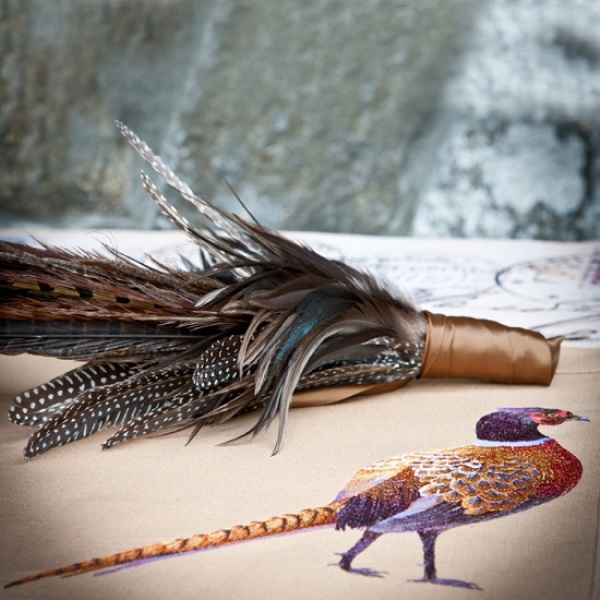
Pheasant Bouquet Creation
http://www.weddingomania.com/40-unique-and-non-traditional-wedding-bouquets/pictures/2829/
This stunning arrangement is incredibly simple to do and yet stands out so elegantly.
- Simply gather/buy feathers from the type of bird you’d like to represent. Use various sizes to add depth and texture.
- Sort them so that the taller feathers line up in the back with the medium to shorter feathers circling around in a receding circle.
- Secure the feathers at the bottom with elastics and glue. Wrap a complimentary color of ribbon around the bouquet. Secure with hot glue.
Feather, Berries, and Fabric Bouquet Creation
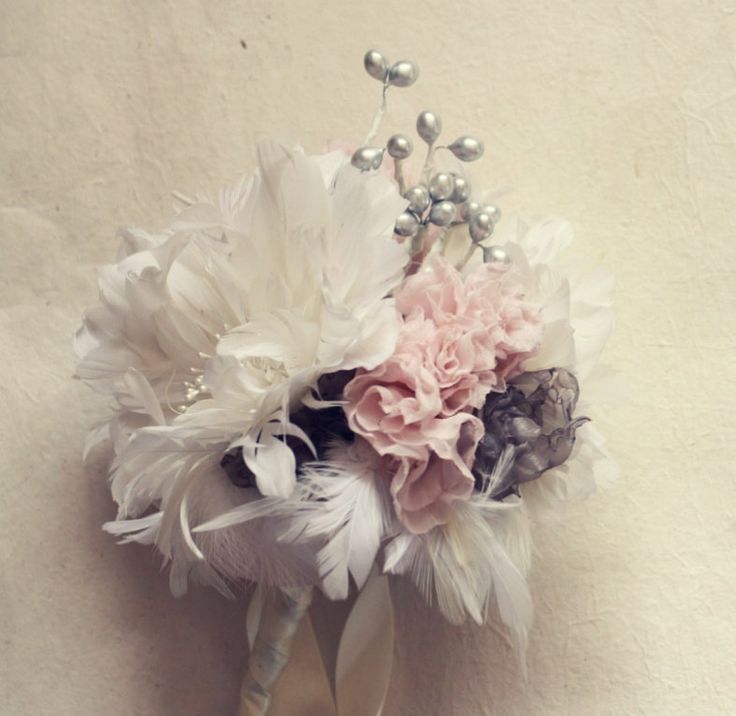
- Supplies: 2 fluffy flowers, berry stem, 40 filler flowers (20 each color), 12 bent feather stems, floral tape, hot glue gun, ribbon, and fabric strip.
- Bring your two flowers back to back and twist their stems together.
- Press the berry branch in the middle of the two flowers and combine them by twisting all the stems together.
- Seal it off with tape, wrapping it all around and down the berry and flower stems.
- Get about 3-5 filler flowers of each color (you’ll form about 8 bunches), then twist all the stems together on each bunch and wrap them in floral tape as you did before.
- Gather the bunches of a color and divide it into two groups and put each grouping in the top middle of the two main flowers you started with. Twist the stems together and tape it to secure.
- Get the bunches of the other color of fillers and split them into two groups. You will attach the groups below the first layer of the flowers. Twist stems and tape to secure.
- Attach the bent feather stems around the base of the flowers. Twist the stems and tape to secure. Do this all around the border.
- Put glue on both sides of the bouquet handle. Put a ribbon over the tip to cover it up. Wrap the ribbon around the stems, adding hot glue was you work your way up so that it will stick better. Tie a bow off at the top to hide any imperfections with the finish.
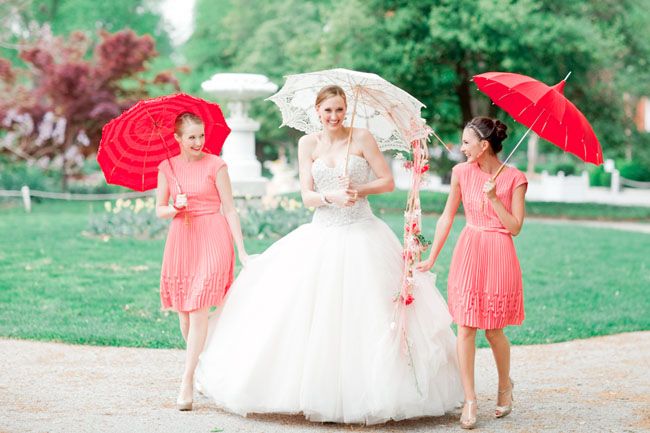
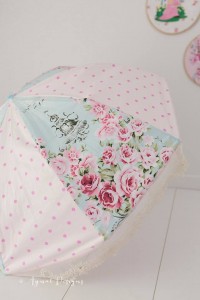
Parasols
-Inspired by Chic Vintage Brides
Parasols are a dainty, vintage, fun, spring/summer wedding alternate for the typical bouquets and corsages.
http://chicvintagebrides.com/index.php/flowers/10-alternative-bridesmaid-bouquets/
Now there are a lot of different parasols available to buy. In many cases it might be easier to buy. But hey…this is a how-to blog. So of course I needed to try to make one on my own here. So here is the one I had some success with.
Also, making your own parasol gives you a lot of personal space to create the patterns and look you want for your wedding.
Pretty Parasol Creation
http://www.tigerlilypatterns.com/2015/07/21/how-to-make-a-parasol/
- Find a (cheap) umbrella whose frame you’re going to be using later. Make sure the cover can be removed from the end beads at the bottom of the spokes and that the top of the umbrella can come off. It’s important all this can come off as it’s part of the removal process to get your good stuff on. And you will be needing those beads at the end so keep a hold of them!
- So now that you’ve got your umbrellas home, take off that top bead and remove the cover of the umbrella. You will probably have to use seam rippers to cut the stitching so it can come away from the frame.
- Cut or unpick one panel/piece of the umbrella to use as a pattern for your work.
- Using the pattern, cut out the number of panels you will need with your cute fabric.
- Start with sewing two panels together and keep doing that until they are all sewed together.
- Put your new cover over the frame and press that top bead back on.
- At this point you will want to turn your umbrella over so that you can hand stitch from the halfway mark, down the frame lining, and up the seams with the spokes. Keep the fabric firm but not too tight.
- When the stitching is done, just make sure that the parasol can close. If it can’t then the fabric might be too tight.
- Hand stitch the ends with the beads at the ends and you’re all set.
Note: If you use stretchy fabric of any kind the umbrella will open more and the result will be a bit flatter like a Japanese style umbrella. That may be what you want, just remember the fabric will have an effect on how the end product holds itself.
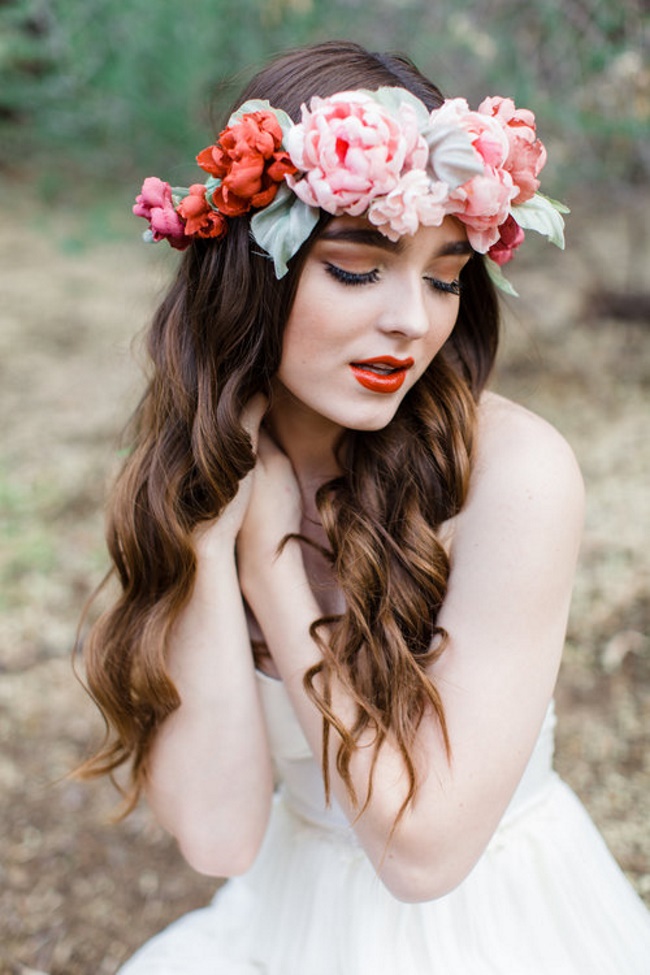
Flower Crowns
-Inspired by Chic Vintage Brides
Flower crowns are a pretty way to go when you don’t want to have to hold the flowers or have them around a wrist or ankle.
http://chicvintagebrides.com/index.php/flowers/10-alternative-bridesmaid-bouquets/
They are very pretty and when you apply the right flowers, berries, leaves, or feathers, it can really fit any season of wedding.
I’ve had a few bridesmaids tell me that flower crowns are in style anyways right now and that they’ve worn theirs with other dresses they have (of course these would have to be the artificial flower crowns, the real flower crowns dry out and die soon sadly enough).
You can buy real or artificial flower crowns or you can make your own. Making your own can be a fun group project for a bridal shower. You get to have all the bridesmaids make their own and it’s very fun.
Flower Crown Creation
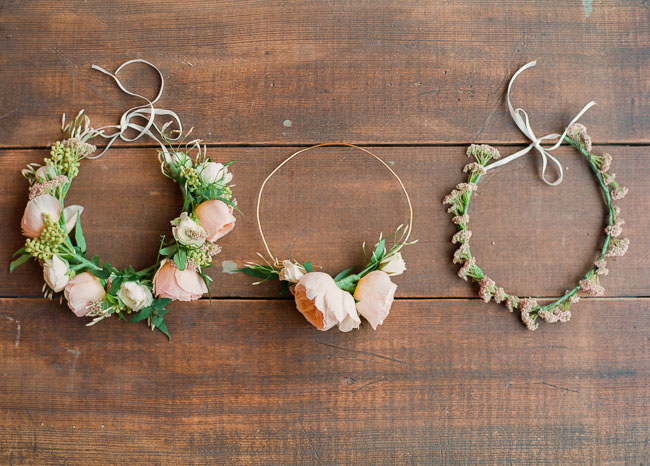
- Pick the flowers, berries, greenery, feathers, and whatever you want to put in your crown. (Tip: If you’re using real flowers, then it’s better to cut an inch off the bottom of your flowers and put them in water for at least an hour, even adding food if they came with it. This will keep them better hydrated and fresher looking longer).
- Measure your head with floral wire to see how big your crown needs to be. Make it a little bigger since you’re going to be giving it fluff with all the plants.
- Use some flexible pieces of your greenery to attach to the wire and secure it on there with little pieces of wire.
- Add in some more un-flowered greens to give it texture and character.
- Add in berries, feathers, and whatever you’d like. You can fill in with them after your flowers or you can work your flowers around them after. It’s really up to you. Just secure them all with floral wire.
- Clip each of your flowers to about ½ – 2 inches of stem beneath it.
- Secure the flower to your green crown with pieces of floral wire wrapped around the stem.
- Note: Make sure the ends of your wires are all smoothed down nicely so it doesn’t poke your head when you put it on.
- Make sure to keep the face of the flowers facing outside and that they are securely fastened onto the crown.
These crowns can be super fun to have themes with. I’ve seen some pretty creative crowns come from themed weddings with a group of friends (the bride and bridesmaids) getting together and having fun.
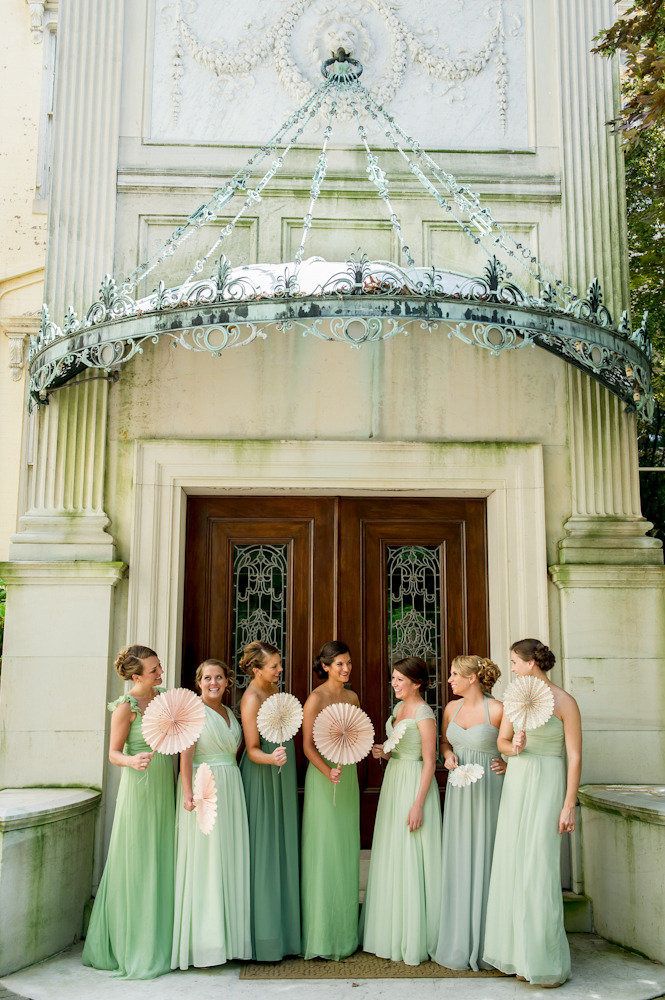
Fans
-Inspired by Chic Vintage Brides
Fans are wonderful because they can be so many different things. They can be elegant, sophisticated, playful, colorful, cultural, sensual, retro, and many others
http://chicvintagebrides.com/index.php/flowers/10-alternative-bridesmaid-bouquets/
It all depends on which way you take them.
Fans come in all price ranges.
Etsy has some affordable options and Britten has a very elegant selection of bridal fans.
There are some gorgeous bridal fans available for purchase. And there are many budget fans and “how-to” plans on building that one special look.
Feather Fan Creation

http://www.wikihow.com/Make-Feather-Fans
Depending on the packet you buy to make your own fan, the instructions might change slightly. But they’re all very similar so this should still help you.
- First off, decorate your staves. If you want some rhinestones or color on them (maybe paint them) now is the time to do it.
- Next you’ll want to trim down your feather so that they are equal in length to each of your staves and equal with each other (generally they should be at the least 4 in wide and 18 in long).
- Hold the stave and feather together with the feather on the back. The feather should curl back from the stave when the stave is on top.
- Tie the feather in place at the lowest set of double holes. If your stave has more than one set of double holes, or if your quill doesn’t reach the lowest ones, then you can use the higher ones to tie it securely with a similar colored cable. Then secure the feather with the top double holes as well. Repeat with each of the feathers and staves and cut off excess wire from the cables.
- Generally using a 3 in bolt will work with the staves. Slip the bolt through the stave (the head of the bolt will be facing the decorated side) and then slip on two washers. Alternate staves and washers over the bolt. The idea is that you use the whole bolt, so you may need more washers in between or a few extra at the end.
- Attach the nut at the end of the bolt to secure it all together. You will need to experiment a little bit on how loose or tight you need it. Looser allows it to open easier but tighter allows the fan to stay open better. Find the tension that’s right for you.
- Spread the fan out so it’s between 90-180 degrees in a semi-circle. Make sure it’s all even and equal distance apart. Then thread fishing line (buy it at any sporting or department store) through the fan. Begin by securely knotting the fishing line in the right hole of the lowest pair of double holes in your stave. Thread the line through each matching hole on your staves and knotting it on the side of each hole. This will prevent the fan from opening further than this angle.
- Give your fan a few tests, make sure everything runs smoothly, and put the finishing touches on its appearance.
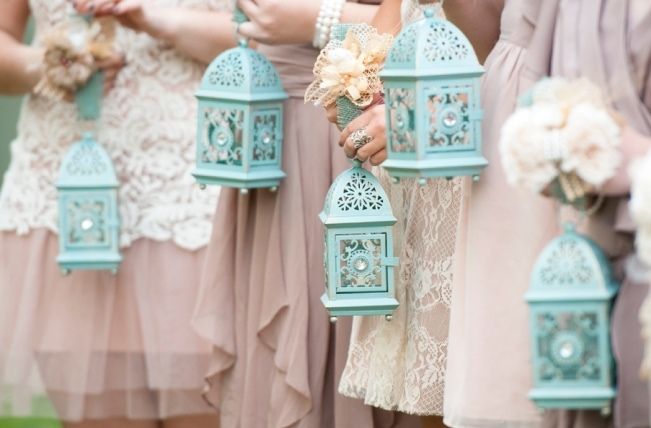
Lanterns
-Inspired by Chic Vintage Brides
Lanterns are beautiful in a wedding line up. They can look cute and chic to fairytale and elegant.
http://chicvintagebrides.com/index.php/flowers/10-alternative-bridesmaid-bouquets/
Lanterns are beautiful in a wedding line up. They can look cute and chic to fairytale and elegant.
They are particularly enchanting in outdoor weddings towards the evening and night. Just beautiful!
Lanterns are pretty easy to make up for a wedding.
Simply pick a design fits your theme and add any elements that might enhance it. You might like to tie some flowers in, or drape some bells across the top or bottom.
Lanterns are a sure way to make a wedding unique and glowing!
Cow Bells
-Inspired by Chic Vintage Brides
Just like the lanterns, cowbells are easy to incorporate and decorate in a unique way that can easily fit a wedding theme.
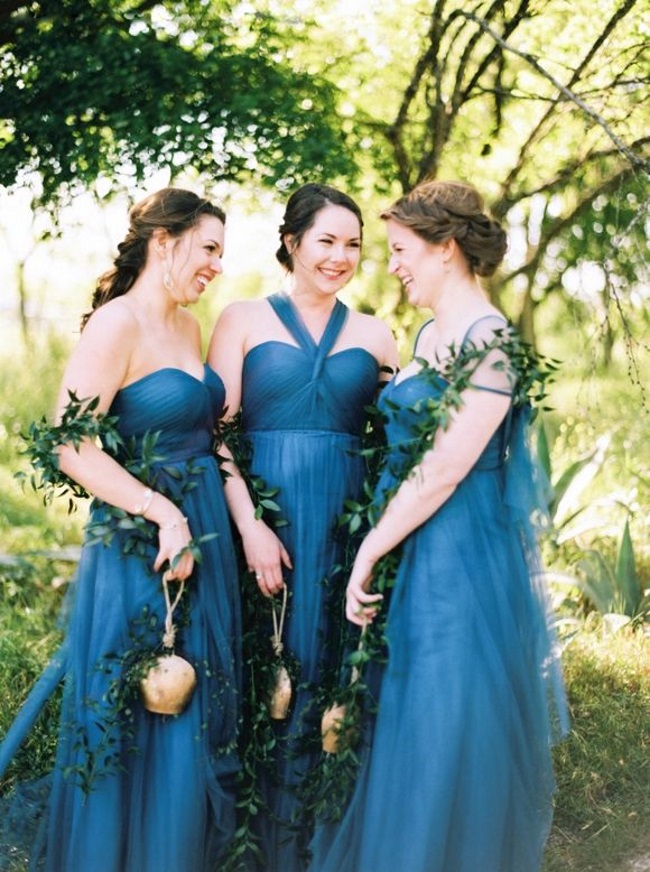
Fine Art and Editorial Film Wedding Photographer Taylor Lord
Drape ivy, flowers, or mesh over them. Get together at the bridal party and decorate them in individual ways for the wedding with paints, jewels, flowers, etc.
Whatever suits your fancy!
Bells are a great accent for a country wedding.